Hello, friends! I am so thrilled you’re here today because I have something truly magical to share with you. Have you ever wanted to make a cute, functional little pouch but felt completely intimidated by the thought of sewing in a zipper? Or maybe you just want a project that is fast, satisfying, and uses up those beautiful fabric scraps you’ve been saving?
Well, I have the perfect solution for you: the Easy Snappy Pouch! This project is a total game-changer. It’s one of those "aha!" moments in sewing where you realize you don’t need fancy hardware or complex closures to create something professional and useful. Instead of a zipper, we are using a little bit of "sewing magic" in the form of snappy bands, which, as you’ll soon see, is actually something you might already have in your junk drawer!
I remember the first time I made one of these; I was absolutely mesmerized by how the top just snaps shut on its own. It’s perfect for holding jewelry, earbuds, sewing notions, or even as a little gift bag. And the best part? It’s incredibly beginner-friendly. If you can sew a straight line, you can make this pouch!
A Special Gift from Missouri Star Quilt Company
Before we dive into the "how-to," I have some amazing news to share. My friends over at Missouri Star Quilt Company are being incredibly generous! They are gifting the pattern for this Snappy Pouch for FREE through May 31st.
There is a limit of one per person, so you definitely want to grab yours while you can. This pattern is so well-written and makes the whole process a breeze. You can find everything you need to get started right here at Missouri Star Quilt Co.
To get your hands on this freebie, head over to my Facebook page @thecraftyauthor and look for the pinned comment. I’ve laid out the exact instructions there so you can claim your pattern and start sewing along with me! Isn't that exciting? I just love it when we can share these creative gifts with our community.
The Secret "Magic" Ingredient: Snappy Bands
You might be wondering, "Anisa, how does it stay closed without a zipper or a button?" This is where the fun begins! The "snappy" in Snappy Pouch comes from using sections of a metal measuring tape. Yes, you read that right!
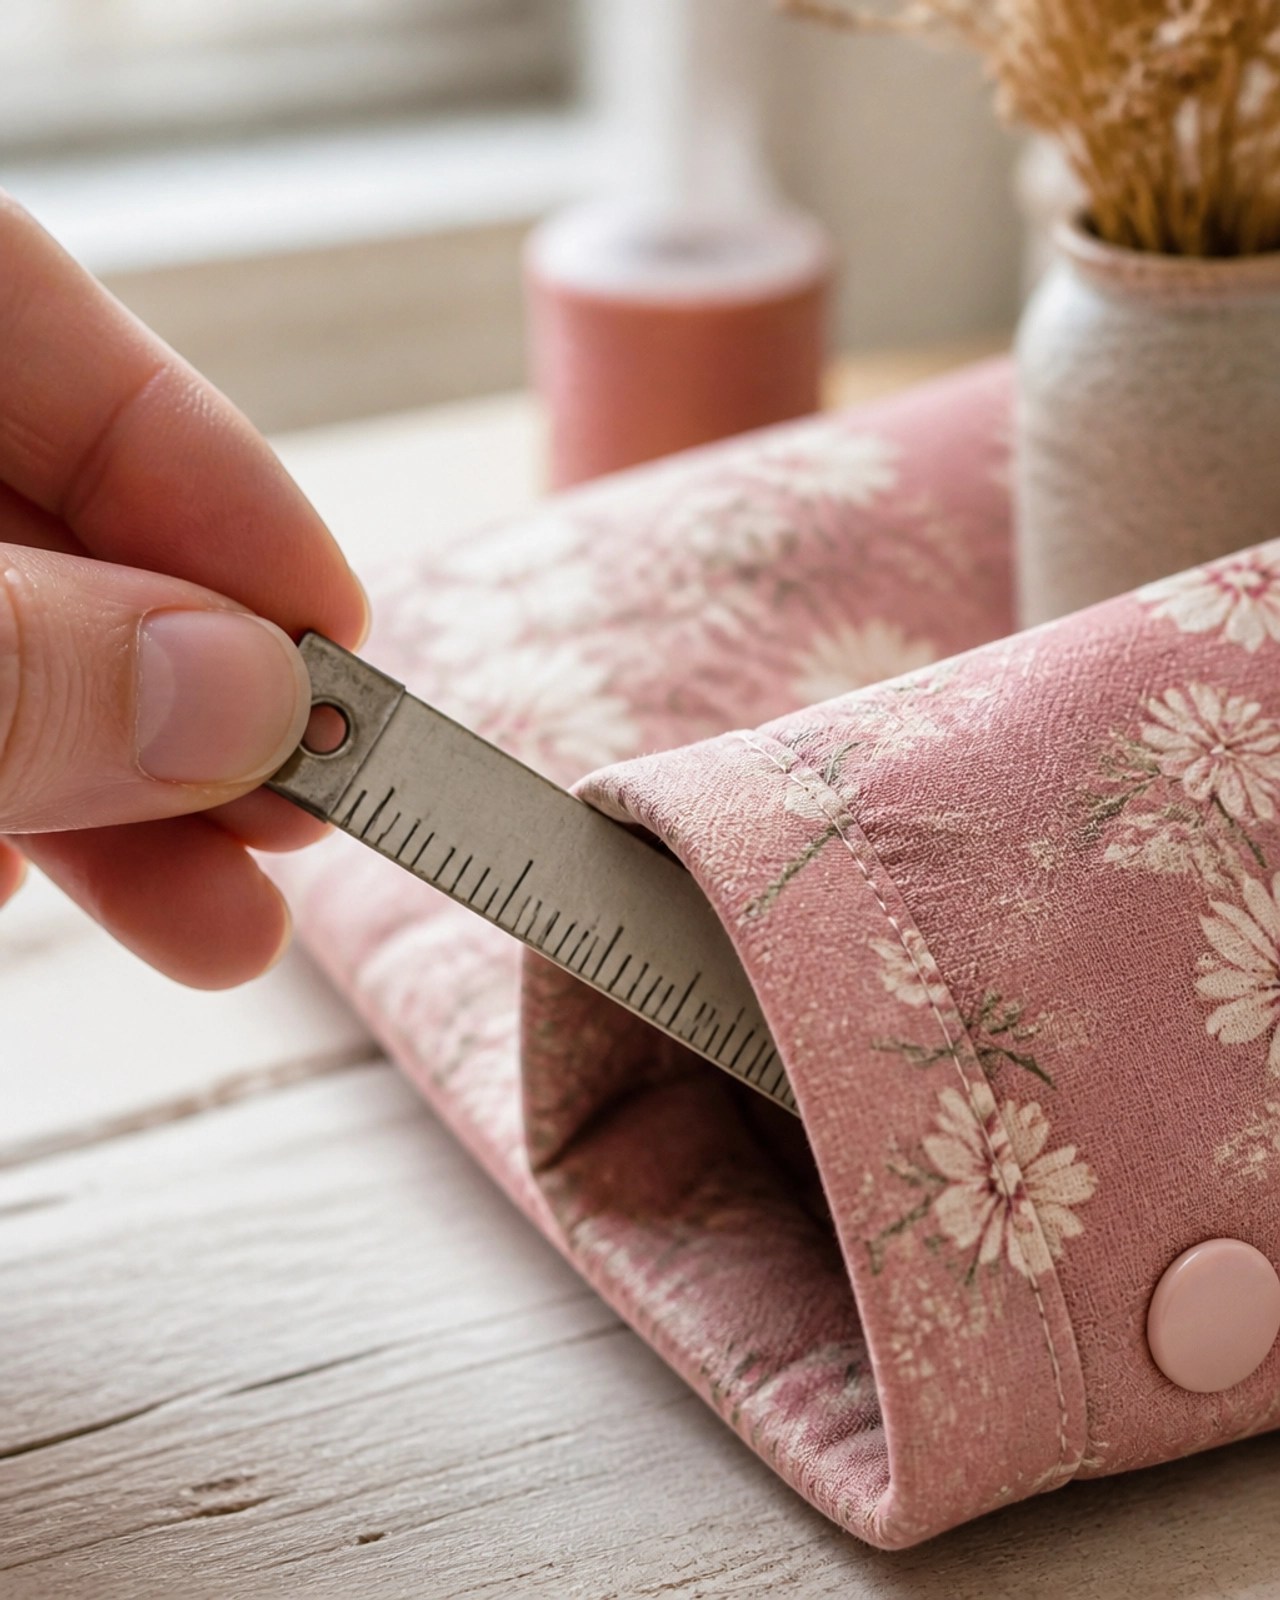
"There is something so satisfying about repurposing a simple tool like a measuring tape into a clever sewing closure. It’s practical, inexpensive, and works like a charm every single time!"
By cutting small lengths of an old (or new!) metal measuring tape and encased them in fabric, you create a spring-loaded closure. When you squeeze the sides, the pouch pops open. Let go, and snap, it’s securely closed. It’s the ultimate "no-hardware" hardware solution! If you've been following my Scrap Quilt Series, you know how much I love finding creative ways to use what we have on hand.
Why You’ll Love This Project
There are so many reasons to fall in love with the Snappy Pouch. First of all, it is a scrap-buster’s dream. If you’re like me, you probably have a bin full of beautiful fabric pieces that are too small for a quilt but too pretty to throw away. This project is exactly what those scraps were made for.
It also pairs beautifully with other small projects. For example, if you’ve already made my Needle Book, a matching Snappy Pouch would make the most adorable sewing kit set!
Here are a few more reasons why I think you're going to enjoy this:
- Speed: You can whip one of these up in under 30 minutes.
- Utility: They are great for organizing everything from lip balms to charging cables.
- Gifts: These make wonderful stocking stuffers or "just because" gifts for friends and family.
- Success: It’s a high-reward project that builds confidence for beginners.
What You’ll Need to Get Started
To make your own Snappy Pouch, you won't need much. Here is a quick list of the supplies I recommend:
- Fabric Scraps: Two pieces for the exterior and two for the lining. Soft feminine tones like dusty rose, cream, or floral prints look absolutely stunning for these.
- Metal Measuring Tape: A standard 1-inch wide metal tape works best. You’ll be cutting two small pieces from it.
- Electrical or Masking Tape: To cover the sharp edges of the cut measuring tape.
- Basic Sewing Supplies: Your sewing machine, thread, and scissors. I personally love using my AccuQuilt for precise cutting, but a rotary cutter and mat work perfectly too!
- The Free Pattern: Don't forget to grab it from Missouri Star!
Putting It All Together
The process is quite simple. You’ll start by preparing your fabric pieces according to the pattern. One tip I always share with my students is to choose fabrics that have a bit of contrast between the lining and the exterior. It adds a little "pop" of surprise when you open the pouch!
Once your fabric is ready, you'll create casings at the top of the pouch. This is where the magic happens. You’ll slide your prepared measuring tape strips into these casings. Just make sure the "curve" of the measuring tape is facing the right way so the pouch snaps shut instead of staying open!
I go over all of these details in the video tutorial above, so make sure to give it a watch if you want to see the step-by-step movements. I find that seeing the "snap" in action really helps it all click into place.
Join the Conversation!
Are you joining the madness? I would love to see the pouches you create! There is nothing that makes me happier than seeing your finished projects. Please come over and join our Facebook Group where you can share photos of your Snappy Pouches and get inspired by what others are making. It’s such a warm and supportive community, and we would love to have you there.
If you want to dive even deeper into the world of quilting and sewing with me, I’d love for you to join the waitlist for The Crafty Author Clubhouse™. It’s our exclusive membership community where we do monthly sew-alongs, share exclusive patterns, and just have a wonderful time creating together. You can sign up for the waitlist here.
Thank you so much for spending some of your day with me. I hope this project brings a little spark of "snappy" joy to your sewing room!
Keep on craftin'!
Anisa
Shop Our Partners


Affiliate disclosure: This page contains affiliate links. If you shop through these links, I may earn a small commission at no extra cost to you. Thank you for supporting The Crafty Author!