
Hello, friends! I am so thrilled you’ve stopped by the blog today. If you’ve been following along with me for a while, you know that there is nothing I love more than a project that is both practical and practically instant. There is something so incredibly satisfying about sitting down with a small stack of fabric and getting up an hour later with a finished, functional gift.
Today, we are talking about one of my absolute favorites from our friends over at Missouri Star Quilt Co: the Snappy Pouch!
This post is a special feature for our upcoming Sunday long-form video on May 17, 2026. I wanted to give you a head start on the details so you can have your fabric pulled and your sewing machine ready to go when the video drops. Trust me, once you make one of these, you’re going to want to make ten. Are you joining the madness? I certainly hope so!
What is a Snappy Pouch?
If you haven't seen these before, prepare to be delighted. A Snappy Pouch is a small fabric bag that uses a very clever secret ingredient to stay closed: metal measuring tape!
Yes, you read that right. By using short lengths of a standard hardware store tape measure, you create a "snap" closure that stays shut on its own but pops open with a gentle squeeze. It is a fantastic way to store earbuds, jewelry, sewing notions, or even those loose coins that always seem to disappear into the bottom of your handbag.
Why This Project is a Must-Try
As a mentor in this creative world, I am always looking for ways to help you build your confidence. Sometimes we get bogged down in massive, queen-sized quilts that take months (or years!) to finish. While those are beautiful, we all need those "quick wins" to keep our creative spirits high.
The Snappy Pouch is the ultimate quick win. It’s a great project for using up those precious fabric scraps you can’t bear to throw away, and it teaches you a bit about construction and "thinking outside the box" when it comes to materials.
"Quilting is about more than just blankets; it’s about the joy of creating something useful with your own two hands."
Materials You’ll Need
Before you dive in, let’s make sure you have your supplies gathered. Here is what I recommend for the best results:
- Fabric: You’ll need two coordinating fabrics, one for the outside and one for the lining. Fat quarters are perfect for this!
- Interfacing: To give the pouch a bit of structure, I love using a medium-weight fusible interfacing.
- A Metal Tape Measure: A cheap 1-inch wide tape measure from the hardware store works best. (Pro tip: Wear gloves when cutting the tape, it can be sharp!)
- Electrical Tape: To cover the cut ends of the metal tape so they don't poke through your fabric.
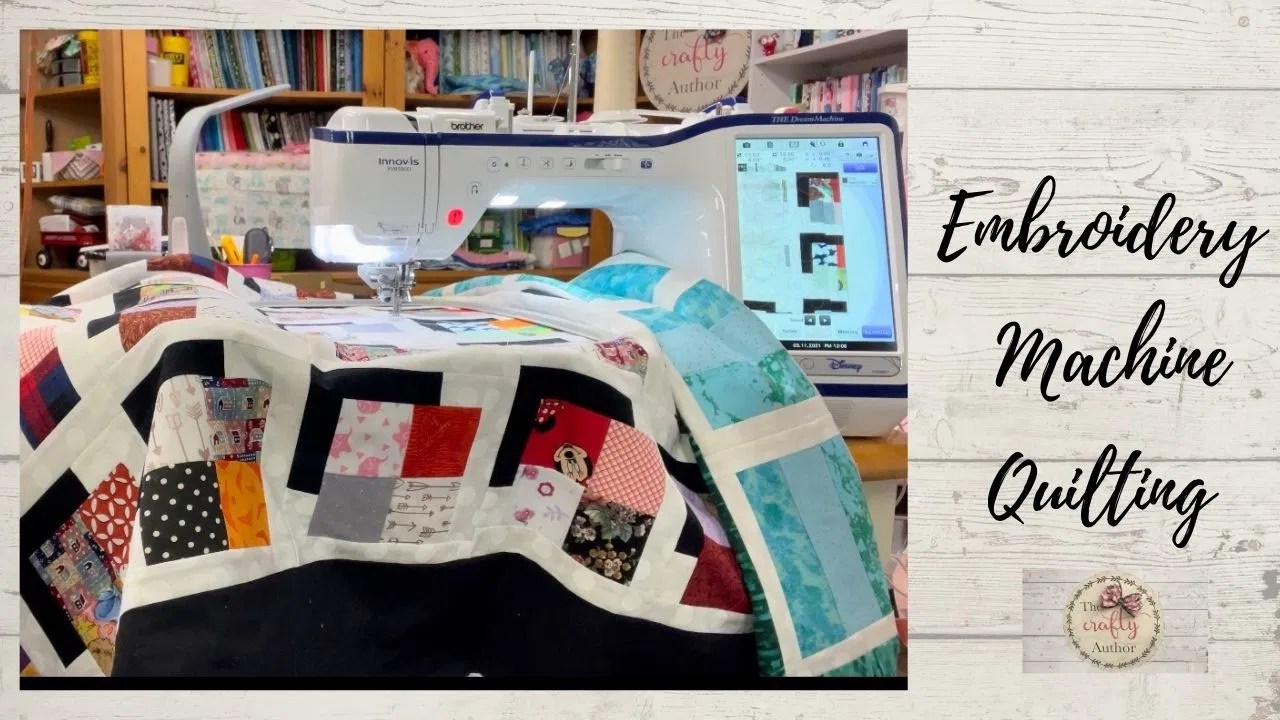
- Your Sewing Machine: I’ll be using my trusty Bernina for the tutorial, but any machine that can handle a straight stitch will work beautifully.
Step-by-Step Guidance (The Penny Way!)
While the full video tutorial will go live this Sunday, here is a little roadmap of the process to get your brain in "making mode."
1. Prep Your Fabric
Cut your exterior, lining, and interfacing to the size specified in the pattern. I like to fuse my interfacing to the wrong side of the exterior fabric first. It makes everything so much easier to handle. Isn't it fresh when the fabric feels crisp and ready to work?
2. The "Snap" Secret
This is the part that usually makes people nervous, but don't be! You’re going to cut two pieces of the metal tape measure. Important safety note: Use old scissors or wire cutters, don't use your good fabric shears! Once cut, wrap the ends in electrical tape. This is a teaching moment: always protect your stitches (and your fingers) from sharp edges!
3. Construction
You’ll sew your exterior and lining pieces together, leaving a casing for the tape measure pieces to slide into. It’s like making a tiny curtain rod pocket.
4. The Final Assembly
Once the "snaps" are inside, you’ll sew the side seams. Because we are working with a small space, I recommend using a walking foot if you have one, or just taking it nice and slow.
Get the Pattern & A Special Discount!
I am so happy to share that Missouri Star has provided a free pattern for this project. You can grab it right here:
Download the Free Snappy Pouch Pattern Here
But wait, it gets better! Because I love my Crafty Author community so much, there is a special discount that applies automatically at checkout when you use that link.
Please note: This discount is limited to the first 200 uses (one per person), so if you’ve been eyeing some new fabric or tools to go along with your pouch project, don't wait!

Personal Tips for Success
I’ve made dozens of these, and here are a few things I’ve learned along the way:
- Fabric Choice: Choose a print that isn't too directional if it's your first time. It removes the stress of making sure the "birds aren't upside down" on one side of the pouch.
- The Squeeze Test: Before you finish the final side seams, slide your tape measure pieces in and give them a squeeze. Make sure they are oriented the right way (the curve of the tape should face inward) so the pouch snaps shut properly.
- Batch Sewing: Once you have the hang of it, cut out five or six at once. You can chain-piece these just like quilt blocks!
Join the Community
One of the best parts of being "The Crafty Author" is seeing what you create. When you finish your Snappy Pouch, please share it!
Also, a huge shoutout to the team at Missouri Star Quilt Co. They are such a light in the quilting community. Be sure to follow @missouriquiltco on social media for even more inspiration. They are constantly coming up with brilliant ways to make our lives more creative and fun.
If you’re looking for even more support, don't forget about The Crafty Author Clubhouse™. It’s our little corner of the internet where we do exclusive sew-alongs and dive deeper into techniques just like this one. We would love to have you!
Final Thoughts
I hope you’re as excited for Sunday’s video as I am. Projects like the Snappy Pouch remind me why I started sewing 30 years ago. It’s not just about the end product; it’s about the peace and joy we find in the process.
So, go ahead: click that link, get your pattern, and let’s get ready to sew something wonderful together.
Stay crafty, friends!
Anisa
Owner, The Crafty Author
Shop Our Partners
I only recommend products and shops that I truly love and use in my own studio. Support these wonderful businesses by shopping through the links below!
| Partner | Image | Shop Link |
|---|---|---|
| Missouri Star Quilt Company | |
Shop Now |
| AccuQuilt |  |
Shop Now |
| HTVRONT |  |
Shop Now |
| Sewing Machines Plus | |
Shop Now |
| Fat Quarter Shop |  |
Shop Now |
| Shop My Amazon Store |  |
Shop Now |
| Ricoma |  |
Shop Now |
Affiliate disclosure: This page contains affiliate links. If you shop through these links, I may earn a small commission at no extra cost to you. Thank you for supporting The Crafty Author!