• Skip to primary navigation
  • Skip to main content
  • Skip to primary sidebar

The Crafty Author™

Crafting & Quilting Made Fun and Easy!

  • HOME
  • BLOG
  • QUILT SERIES
    • BLOCK OF THE MONTH
      • BLOCK OF THE MONTH- JANUARY
      • BLOCK OF THE MONTH- FEBRUARY
      • BLOCK OF THE MONTH- MARCH
      • BLOCK OF THE MONTH- APRIL
      • QUILT BLOCK OF THE MONTH- MAY
      • BLOCK OF THE MONTH – JUNE
      • BLOCK OF THE MONTH – JULY
      • BLOCK OF THE MONTH – AUGUST
      • BLOCK OF THE MONTH: SEPTEMBER
      • BLOCK OF THE MONTH: SEPTEMBER MODIFIED QUILT BLOCK
      • BLOCK OF THE MONTH – OCTOBER
      • BLOCK OF THE MONTH- NOVEMBER
      • BLOCK OF THE MONTH- DECEMBER
    • SCRAPTASTIC SCRAP QUILT
      • What is Scrap Quilting?
      • SCRAPTASTIC SCRAP QUILT 1
      • SCRAPTASTIC SCRAP QUILT 2
      • SCRAPTASTIC SCRAP QUILT 3
      • SCRAPTASTIC SCRAP QUILT 4
      • SCRAPTASTIC SCRAP QUILT 5
      • SCRAPTASTIC SCRAP QUILT 6
      • SCRAPTASTIC SCRAP QUILT 7
      • SCRAPTASTIC SCRAP QUILT 8
      • SCRAPTASTIC SCRAP QUILT #9
      • QUILTING EDGE TO EDGE ON YOUR EMBROIDERY MACHINE PART 1
  • THE CRAFTY AUTHOR™ CLUBHOUSE
  • SHOP THE QUILTED TEE

BLOG

Longarm Machine Emergency! This Happened to My Handi Quilter

May 15, 2026 By The Crafty Author

A quilt loaded on the longarm frame in the studio.

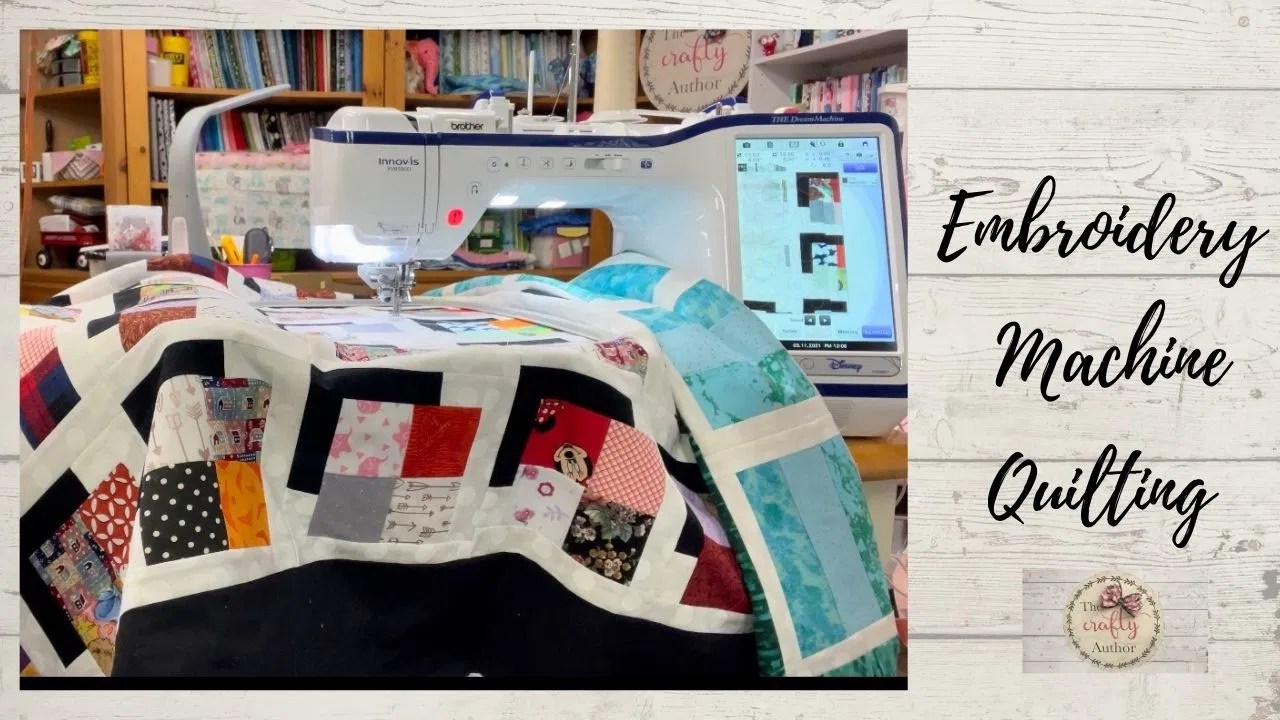
Hello, friends! Welcome back to the studio.
If you’ve been following along with my latest projects, you know how much I absolutely adore my quilting space. It’s usually my happy place, filled with the hum of machines and the vibrant colors of new fabrics. But today, I have to get real with you about something that every longarm owner dreads: a machine emergency.

I’m currently navigating a bit of a "quilt crisis" with my Handi Quilter Simply 16. It’s one of those moments where you have to take a deep breath, remind yourself why you love this craft, and figure out a plan B.

Are you ready to join me in the madness? Let’s talk about what happened and how I’m planning to get back to the stitching I love!

Why I Adore My Longarm (When It’s Working!)

Before we dive into the "surgery" part of today's post, I want to share why I fell in love with longarming in the first place. For those of you who have been quilting on a domestic machine, you know the struggle of the "quilt sandwich."

Owning a longarm machine like my Simply 16 completely changed the game for me. Here are my top three favorite things about it:

  1. The Sandwiching Process: There is no spray basting and no pins! I simply roll everything, the backing, the batting, and the top, onto the frame. It is a massive time-saver and so much easier on the back.
  2. ProStitcher Premium: This is the "brain" of the operation. I can program a design, and the machine executes it with stunning precision. It makes professional-level results accessible to everyone.
  3. The Finished Product: There is nothing quite like the feeling of pulling a finished quilt off that frame. It’s the ultimate "ta-da!" moment.

Anisa smiling beside her Handi Quilter in the studio.

A quilt loaded on the longarm frame in the studio.

The Breakdown: What Went Wrong?

Now, let's talk about the elephant in the room. My $25,000 machine decided to stop behaving. It started when a thread broke during a filming session (you might have seen that in one of my recent shorts!). After I re-threaded, the machine just… quit.

After some troubleshooting with the wonderful team at Handi Quilter, we identified the culprit: a faulty encoder in the carriage.

The encoder is the little "child" that communicates with the machine so it knows where it is on the frame. Without it, the machine can't connect to the carriage, and the ProStitcher can't do its job. It’s incredibly frustrating, especially as a business owner, because when the machine goes down, production stops. I'm currently about three quilts behind!

Quilt Surgery: The Hardest Part

The "emergency" isn't just the broken part; it’s the logistics of the repair. Because the encoder is located in the carriage underneath the machine, we have to perform what I call "quilt surgery."

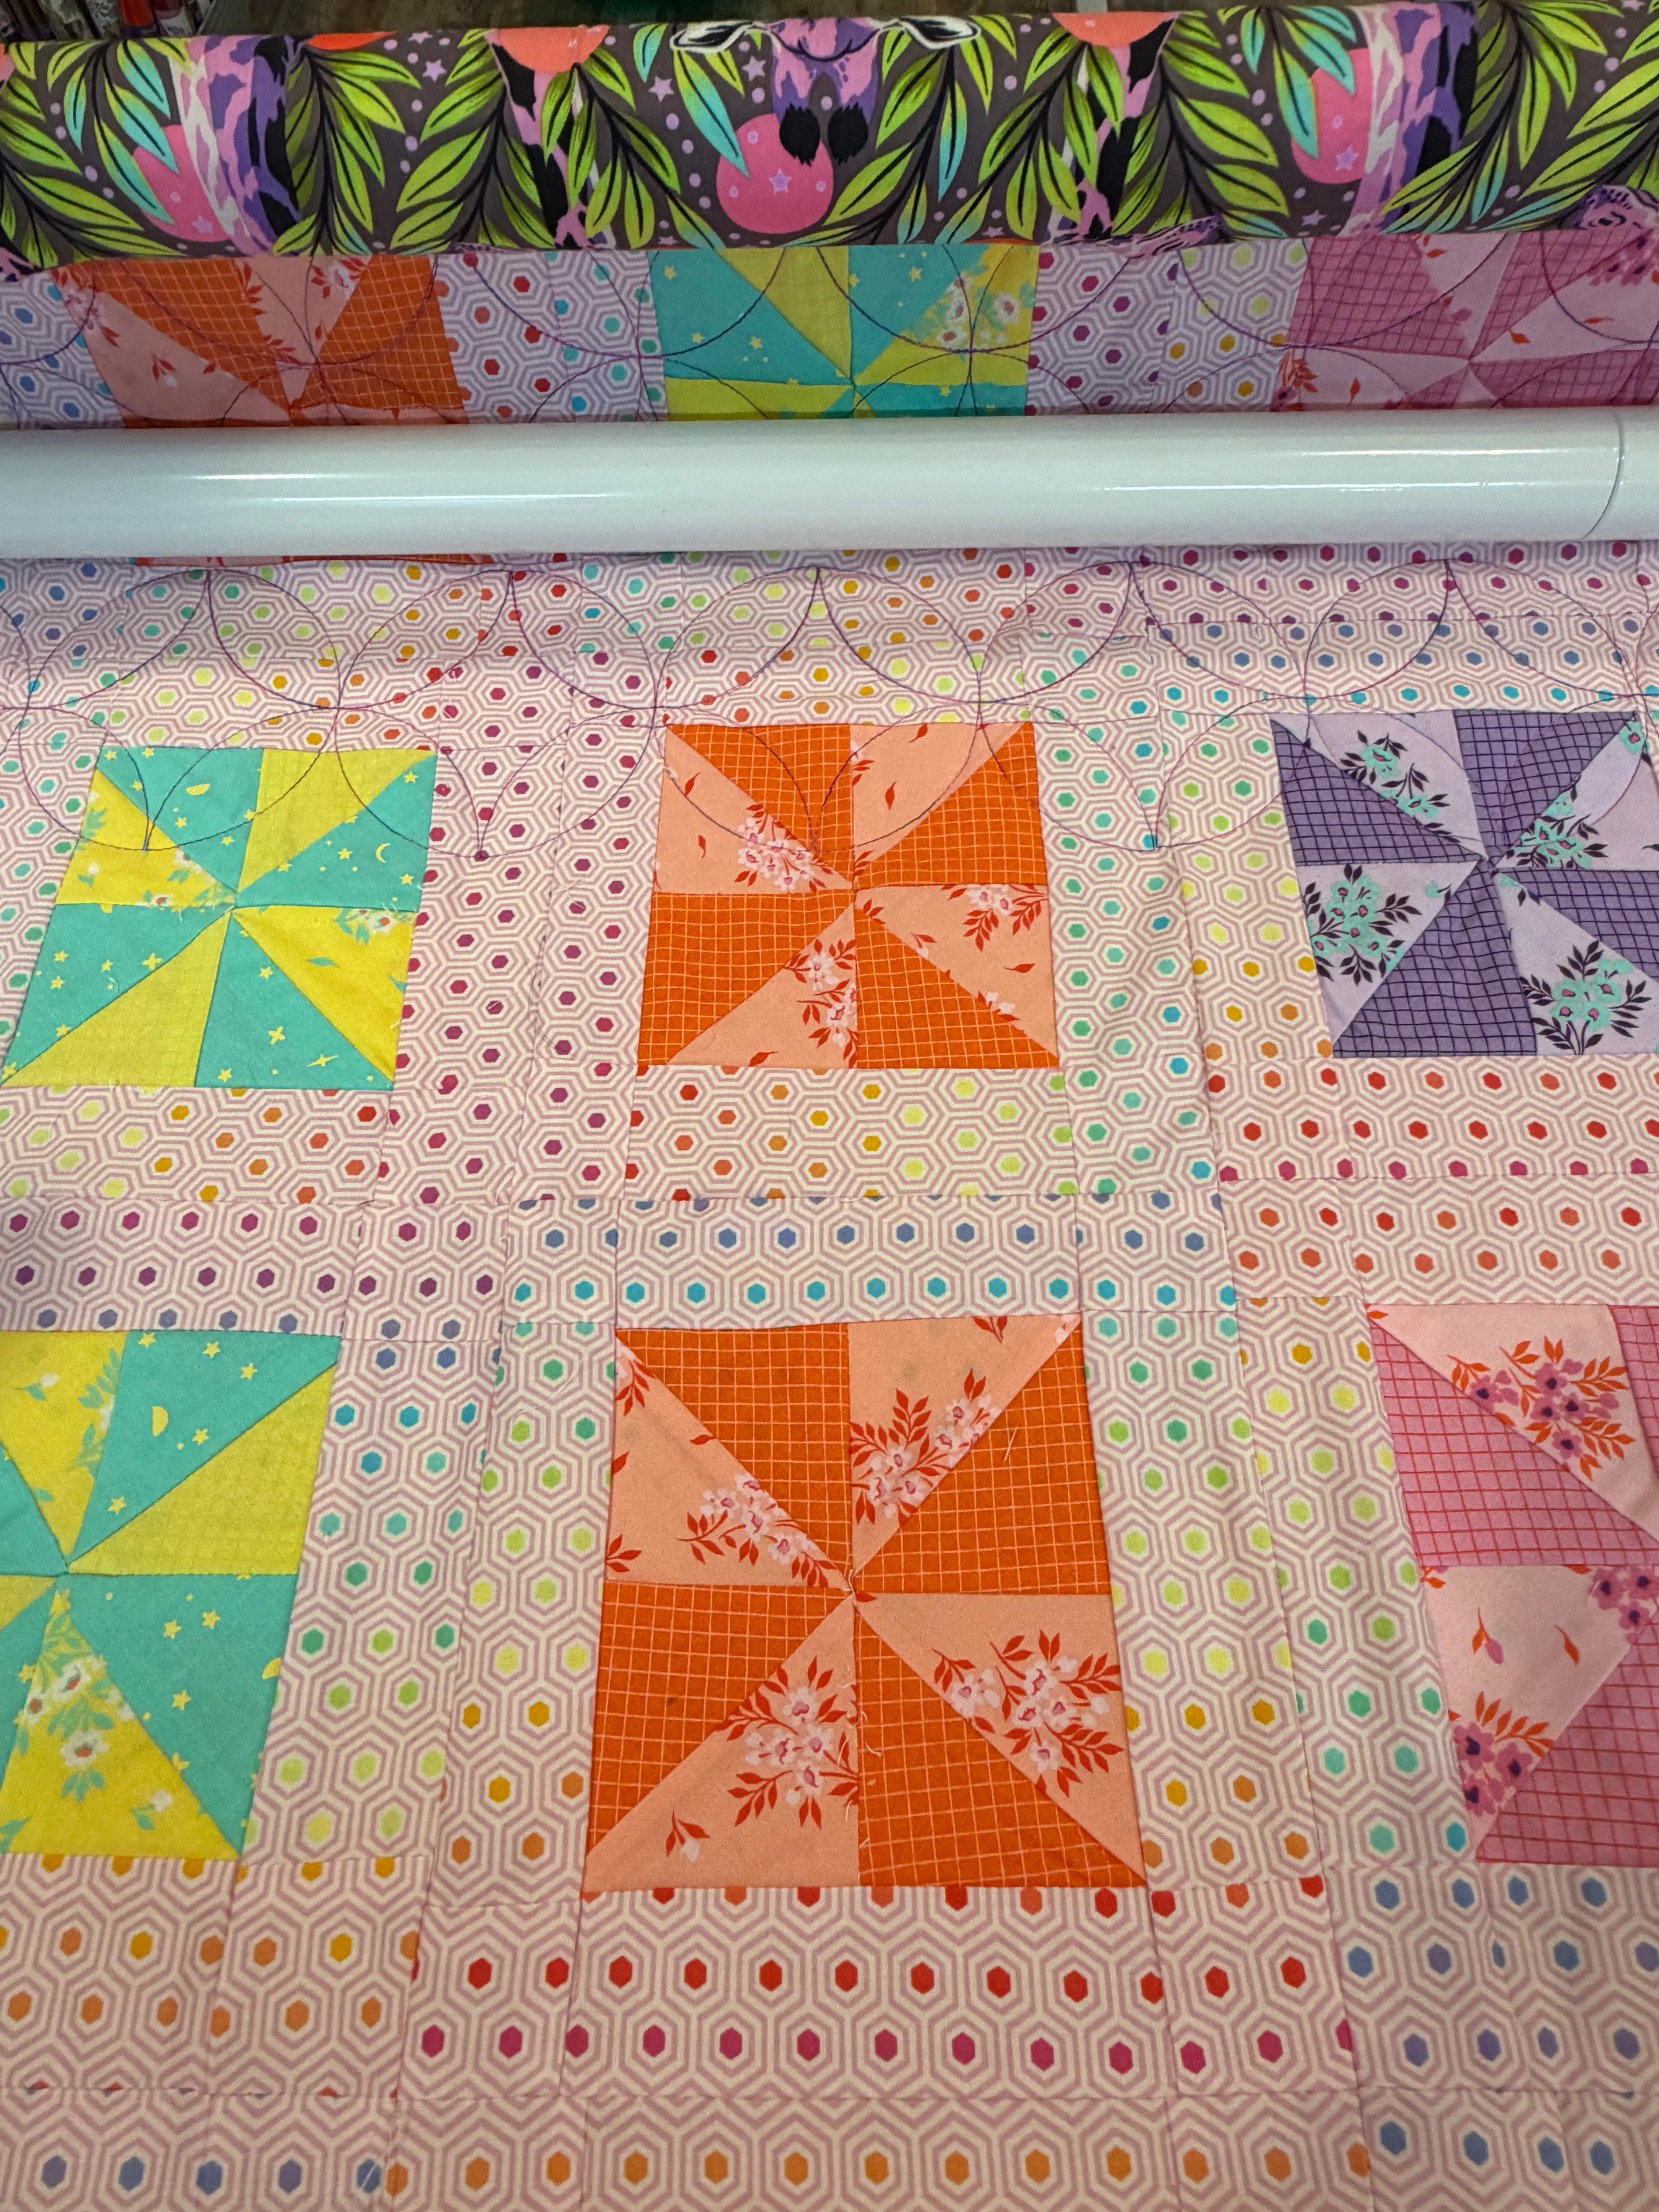
In order to reach the problem area, all of the poles on my 10-foot frame have to come off. That means my current project, the Big Spools Quilt, has to be removed mid-quilting.

"When it rains, it pours. This quilt is holding up the whole process for everyone!"

The real challenge will be putting it back on. Half of it is already quilted and sandwiched, while the other half will be "loosey-goosey." Trying to realign everything so the patterns match up perfectly is going to be a journey. We might laugh, we might cry, but I’m going to take you along for the ride!

A close-up of colorful quilt blocks that inspire future projects.

The Repair Plan (Wish Us Luck!)

So, what’s the plan? Well, I have the new part in hand! Now comes the big decision: do I wait for a professional technician to come out, or do I trust a DIY approach?

My husband, who is incredibly smart (though I'll admit his patience for tiny machine parts can be thin!), wants to try and install it himself. We’re going to give it a go! I’ll be recording the process so you can see exactly what goes into a longarm repair. Send us all the positive thoughts and good vibes, we're going to need them!

Looking Ahead: Future Projects

Even though the machine is currently out of commission, my mind is still racing with new ideas. I have so many exciting projects lined up once we're back in business:

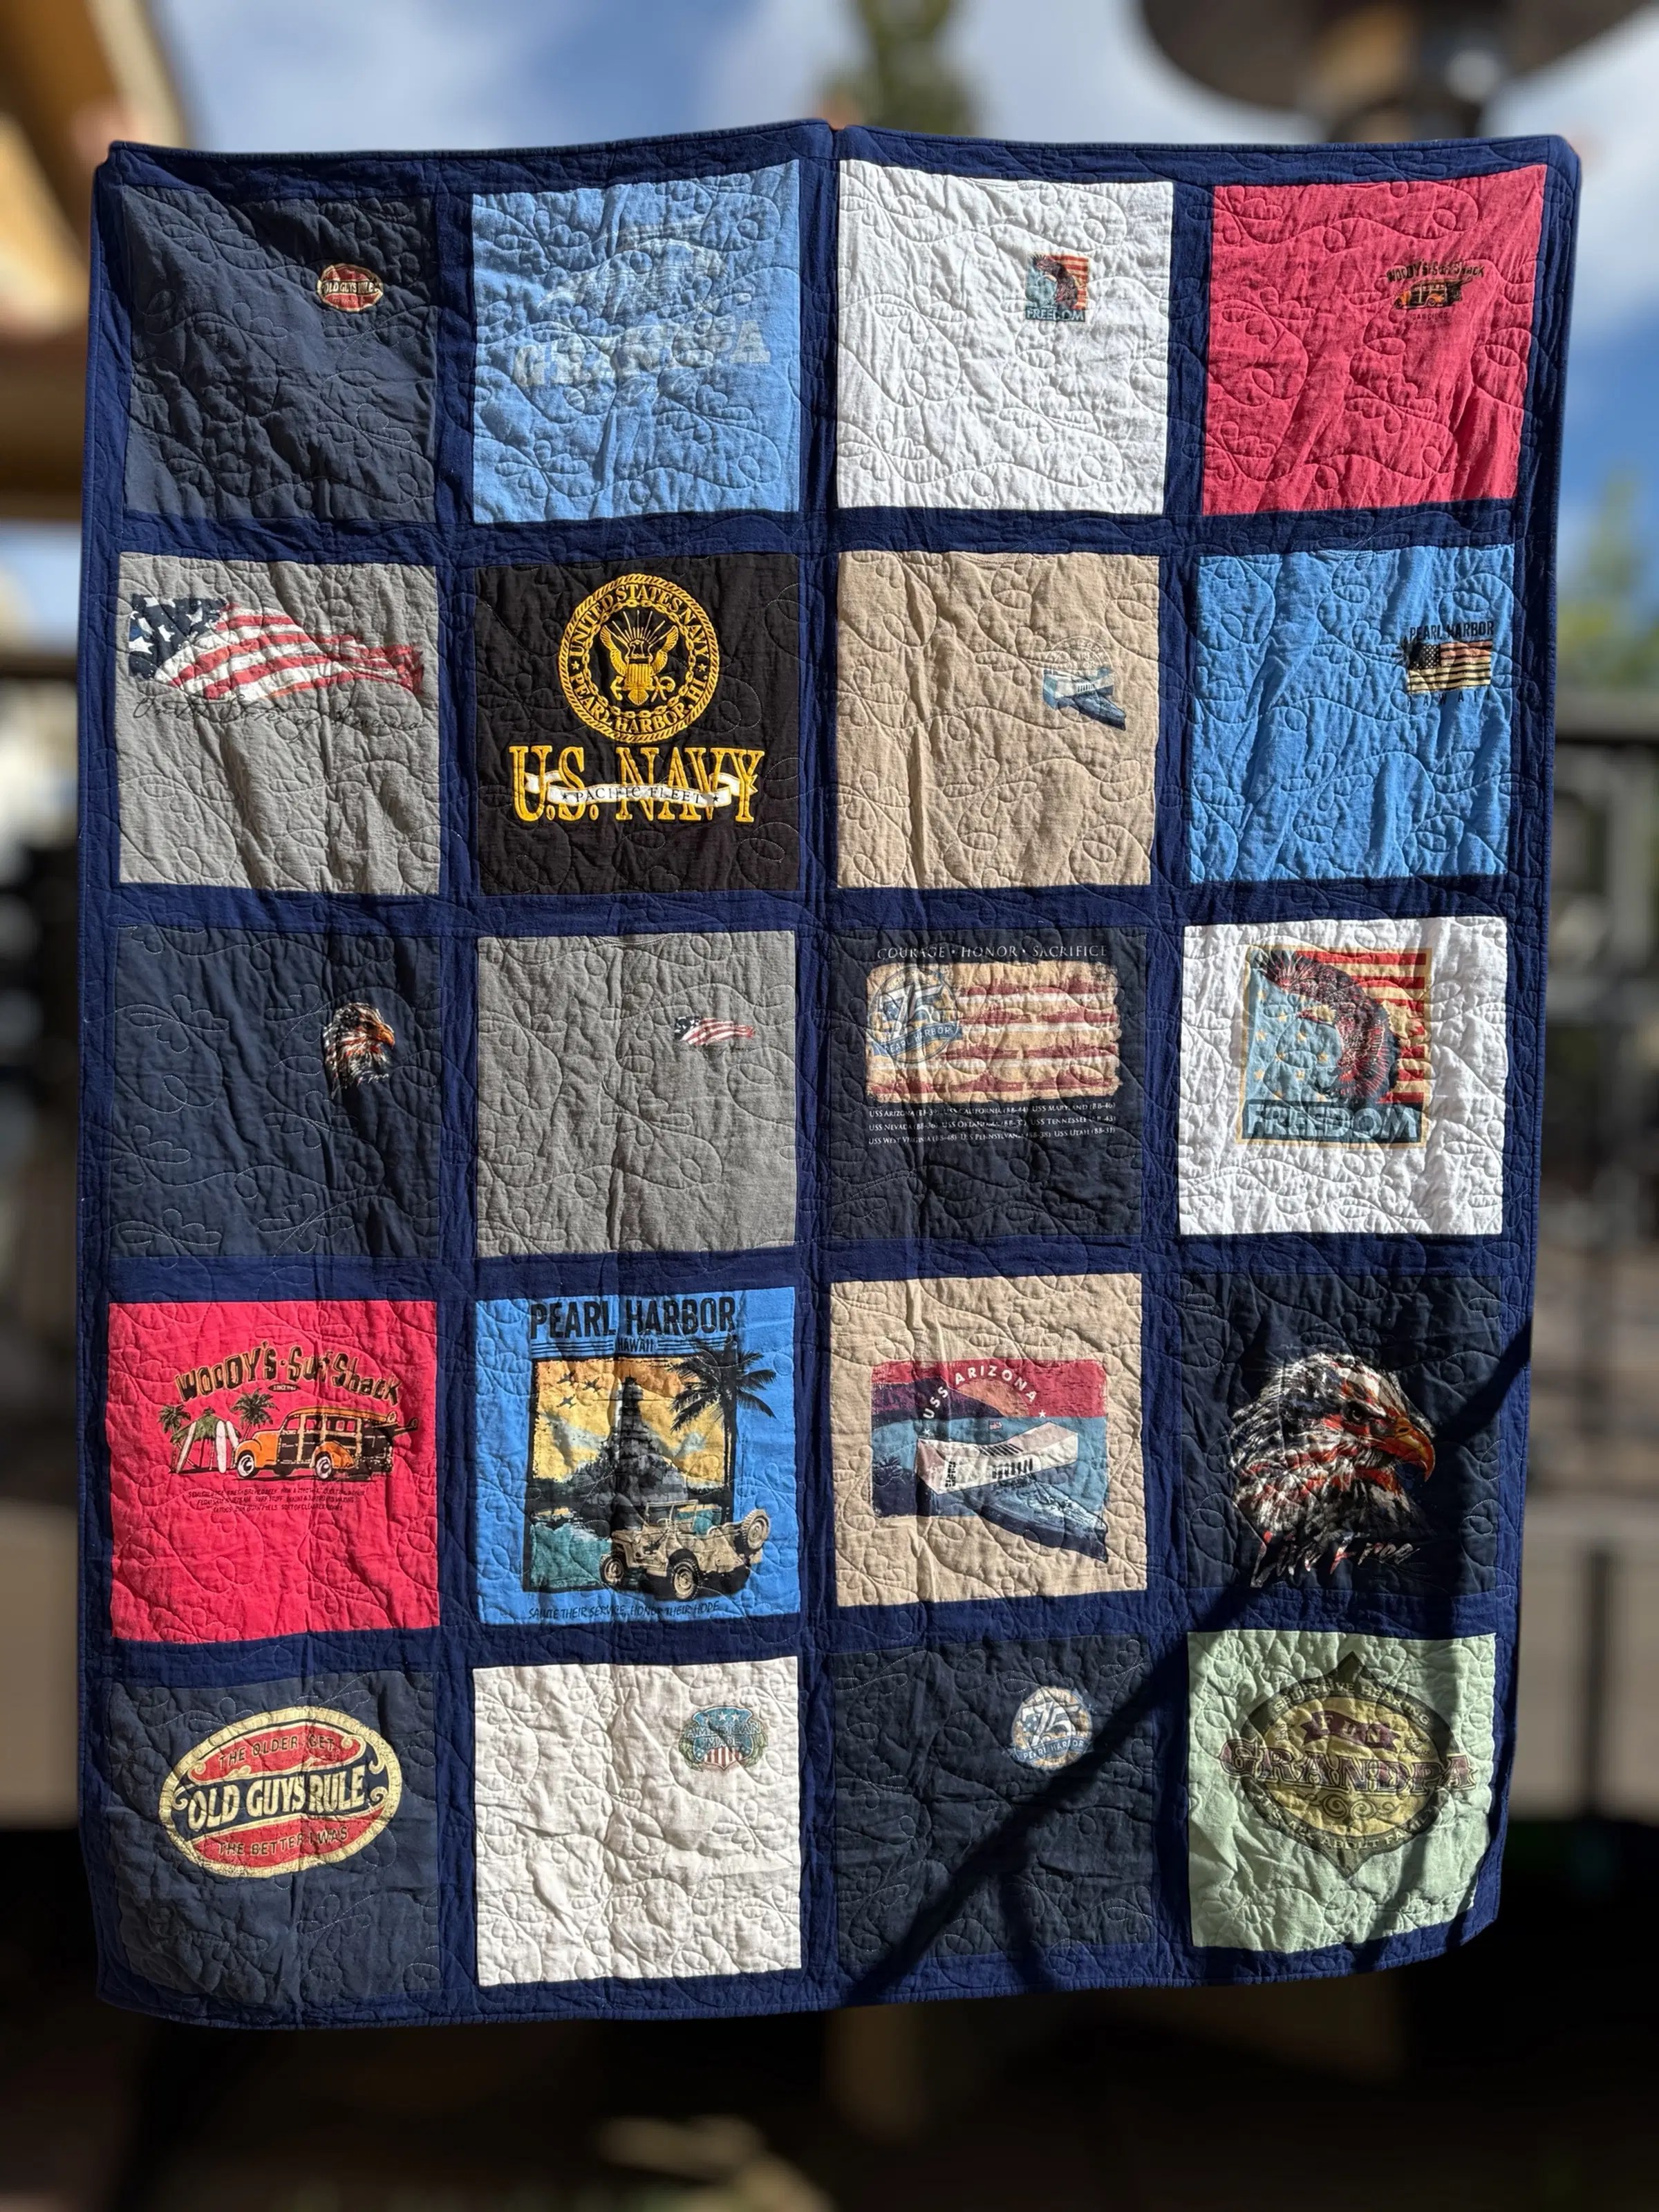
  • A T-shirt Quilt: I’m in the middle of piecing this one and can’t wait to get it on the frame.
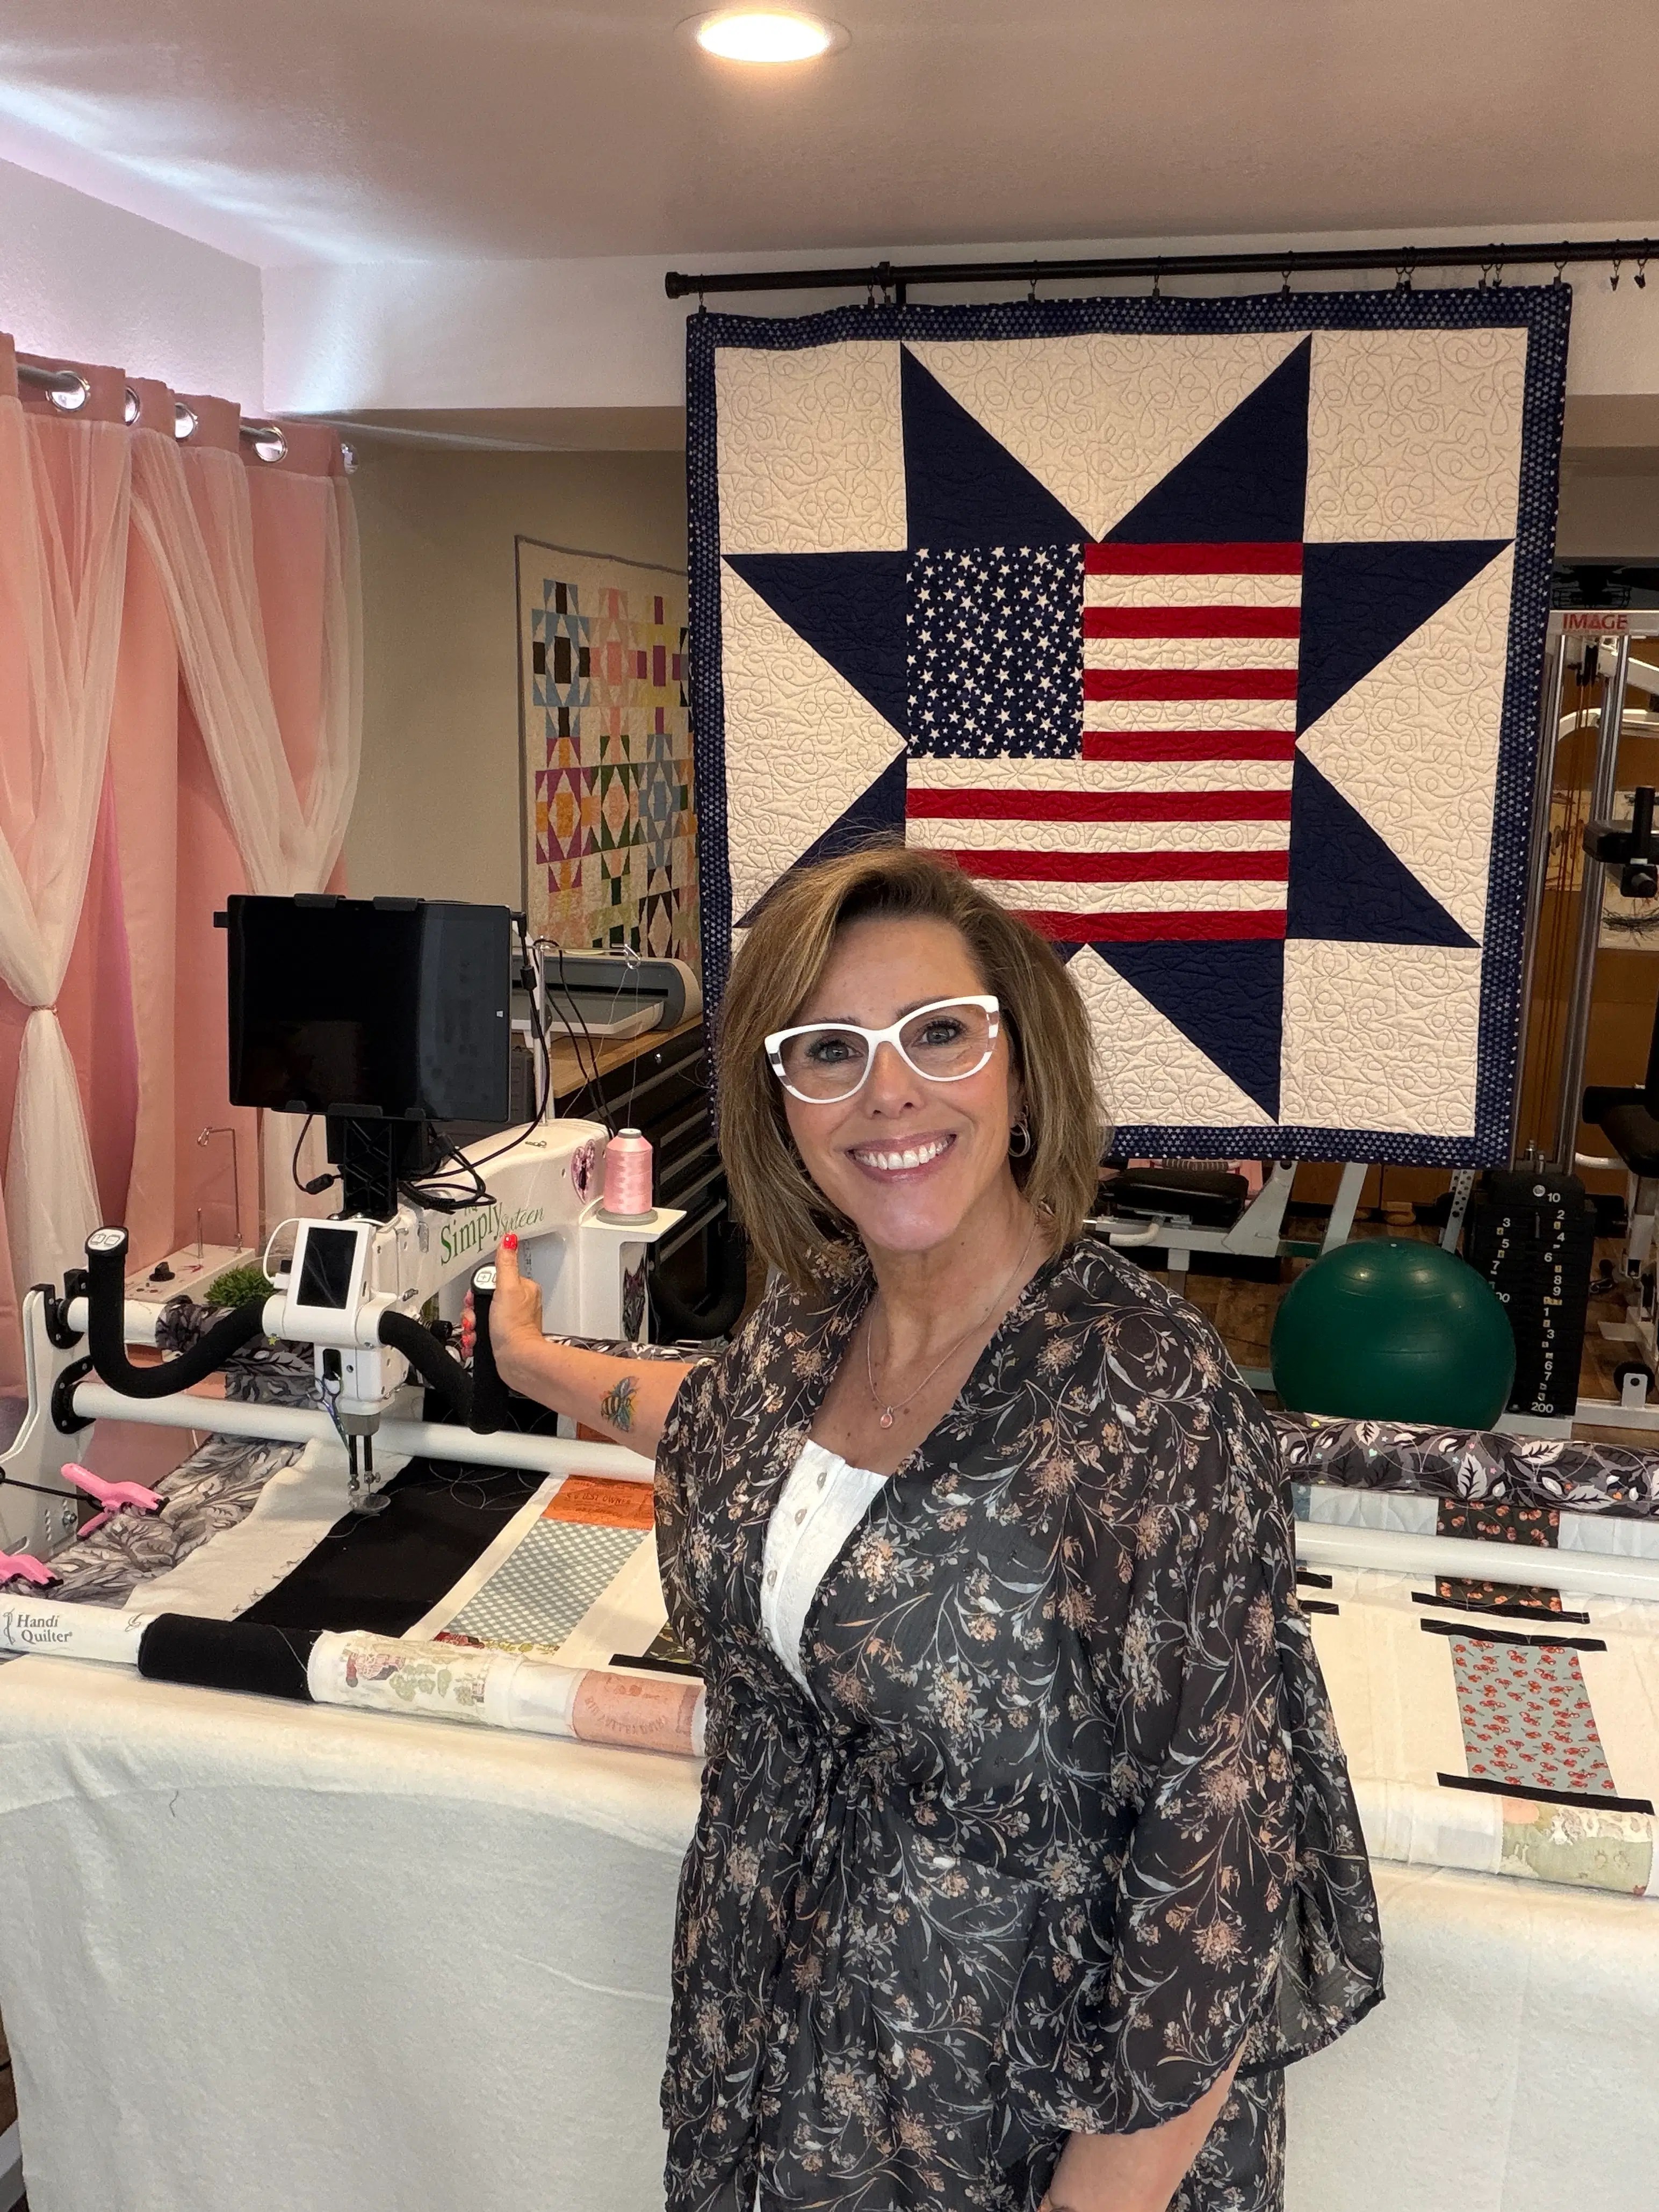
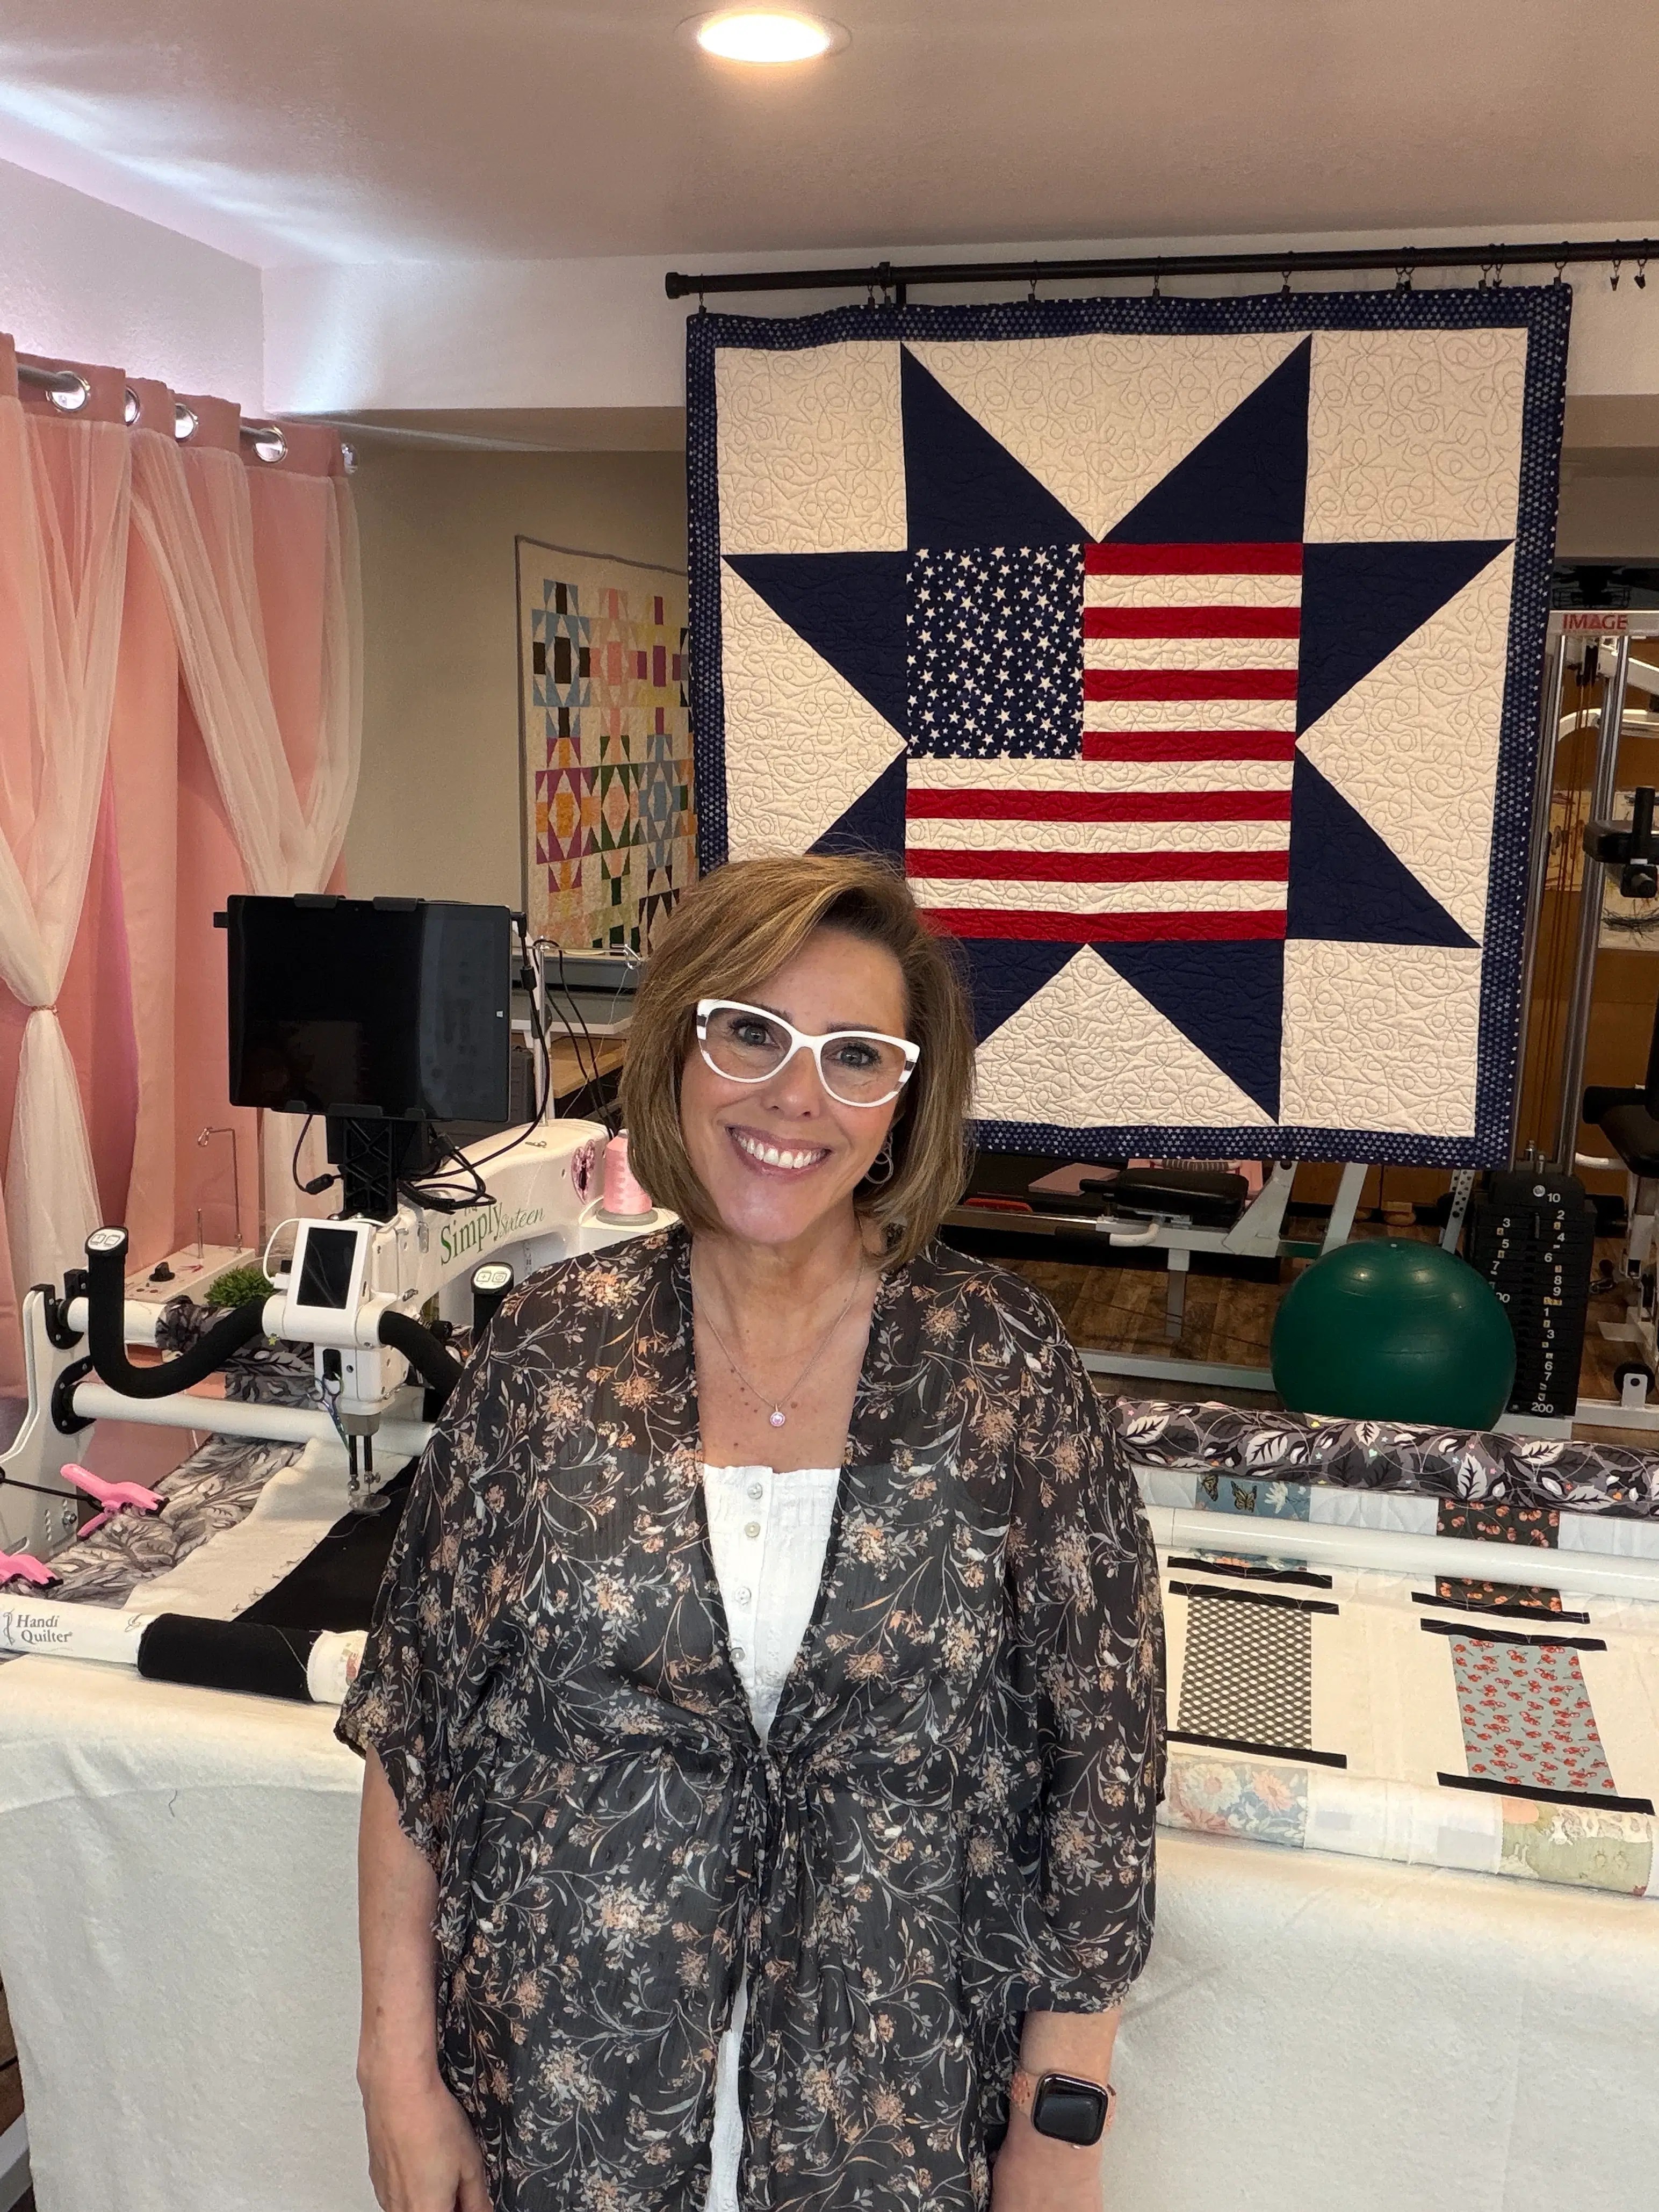
  • The Patriotic Uniform Quilt: This is a very special project for a friend. Her husband was a veteran, and she wants me to create a quilt using his old uniforms. I’ll be using the star pattern I created years ago, and I think it’s going to be absolutely breathtaking.

Creating something meaningful like a memory quilt is why I do what I do. It reminds me that even when the machines break, the heart of quilting is still there.

Anisa with her Handi Quilter in the studio.

Stay Positive and Keep Crafting!

Is it a royal pain when your machine goes down? Yes, absolutely. But the beauty of this community is that we figure it out together. Everything is fixable, and this is just a small bump in the creative road.

I’m so grateful for your support and for being part of The Crafty Author family. If you've ever dealt with a machine emergency, leave a comment and tell me how you handled it! We can swap stories and maybe share a few tips. And if you want even more behind-the-scenes quilting fun, be sure to join the Clubhouse waitlist so you don’t miss what’s coming next!

Check out the full video below to see the "problem child" encoder and the field trip behind my machine!

Watch the Video

Keep on crafting, and I’ll see you guys next time!

Bye-bye!


Shop Our Partners

Affiliate disclosure: This page contains affiliate links. If you shop through these links, I may earn a small commission at no extra cost to you. Thank you for supporting The Crafty Author!

  1. Missouri Star Quilt Company

  2. AccuQuilt

  3. HTVRONT

  4. Sewing Machines Plus

  5. Fat Quarter Shop

  6. Shop My Amazon Store

  7. Ricoma
    Shop Now

Sewing Machine for Beginners: How to Choose Your First Machine Without the Overwhelm

May 13, 2026 By The Crafty Author

Hello there, friends! I am so thrilled that you’ve decided to take the leap into the wonderful world of sewing and quilting. Honestly, there is nothing quite like the feeling of taking a beautiful stack of fabric and turning it into something functional, cozy, and uniquely yours. But I also know exactly how you’re feeling right now, a little bit excited and a whole lot overwhelmed!

When you first start looking at sewing machines, it feels like everyone is speaking a different language. "Drop-in bobbins," "feed dogs," "presser feet", it’s enough to make you want to close your laptop and just buy a pre-made quilt. But wait! Don't do that! I am here to walk you through this process step-by-step. At The Crafty Author, my goal is always to remove that overwhelm and help you find the joy in the process. And with my 30+ years of quilting and sewing experience, I can promise you this: choosing your first machine gets so much easier when you know what really matters.

Choosing your first machine doesn’t have to be a headache. You don’t need a machine that can fly a spaceship; you just need one that makes you feel confident and excited to sit down and sew. Let’s break down how to choose your first sewing machine without the stress!

Why the Right "Starter" Machine Matters

I have been quilting for over 30 years, and if there is one thing I’ve learned, it’s that a frustrating machine is the quickest way to kill a new hobby. If your machine is constantly jamming or the thread is breaking because it’s too finicky, you won’t want to use it. In my own studio, I personally use Brother and Bernina machines, and having dependable equipment makes such a difference when you’re learning or trying something new.

We want a machine that is a partner in your creativity, not an obstacle! A good beginner machine should be intuitive, reliable, and just "easy." You want to spend your time picking out gorgeous fabrics and learning new techniques, not wrestling with a manual that looks like a high-school physics textbook.

Features You Actually Need (and Some You Don't!)

When you start shopping, you’ll see machines with hundreds of built-in stitches. While those tiny little ducks and flower patterns are cute, let’s be real: you are going to use a straight stitch and a zig-zag stitch 95% of the time!

Instead of focusing on the "bells and whistles," here are the features that will actually make your life easier as a beginner:

1. The Automatic Needle Threader

Are you joining the madness of trying to poke a tiny thread through a microscopic needle hole? No, thank you! An automatic needle threader is an absolute game-changer. It saves your eyes, your patience, and your time. I consider this a non-negotiable for anyone starting out today.

2. Top-Loading Drop-In Bobbin

In the old days, you had to remove a metal case from the "basement" of the machine to change your bobbin. Modern machines often have a "drop-in" bobbin with a clear cover. This is fantastic because you can see exactly how much thread you have left before it runs out in the middle of a seam. Talk about a life-saver!

3. Speed Control Slider

I love this feature for beginners! It’s like cruise control for your sewing machine. You can set the maximum speed so that even if you "floor it" with the foot pedal, the machine stays at a nice, slow, manageable pace. This is perfect for building your confidence as you learn to guide the fabric.

4. Adjustable Needle Position

This might sound technical, but it’s actually very simple. It allows you to move the needle to the left or right. This is incredibly helpful when you start quilting and need to maintain that perfect 1/4-inch seam allowance.

sewing-machine-details
A warm, inviting studio view featuring my Brother Dream Machine makes learning feel approachable and fun!

Mechanical vs. Computerized: Which is Better?

This is a question I get all the time!

  • Mechanical Machines: These use knobs and dials to change settings. They are often very sturdy, easy to repair, and budget-friendly. If you like a "hands-on" feel and want something straightforward, a high-quality mechanical machine is a great choice.
  • Computerized Machines: These have buttons and often an LCD screen. They can automate things like the "needle up/down" position and can even suggest which presser foot to use for a specific stitch. They are often more expensive but can be very user-friendly because they do a lot of the thinking for you.

For my friends who are just starting, I often recommend a solid middle-of-the-road computerized machine. I personally use both Brother and Bernina machines in my studio, and both brands offer reliable options depending on your budget, goals, and the features that matter most to you.

Where Should You Buy?

It’s tempting to grab the cheapest machine you see at a big-box craft store, but I always encourage my students to check out dedicated sewing machine retailers. Why? Because they offer support!

When you buy from a place like Sewing Machines Plus, you’re often getting a machine that has been tested, and you have someone to call if you run into trouble. Plus, many local shops offer a free "get to know your machine" class with a purchase. That kind of hands-on help is worth its weight in gold!

Organizing Your New Hobby

Once you have your machine, you’re going to need a place to put it! You don't need a massive dedicated room right away. Even a small corner of the dining room table can work. If you're looking for inspiration on how to set up a cozy and functional space, you have to check out my Craft Room Tour. Seeing how others organize their tools can really help remove the "where do I start?" paralysis.

And don't forget, you'll need some projects to practice on! I highly recommend starting with something simple like my Scrap Quilt Series. It’s the perfect way to get used to your machine's tension and speed without the pressure of a "perfect" project.

"The only way to fail at sewing is to never start. Your first seam doesn't have to be straight; it just has to be finished!"

My Top Tips for Success

  1. Read the Manual (Just a Little!): I know, I know. But just look at the diagram for threading! Most tension issues are caused by the machine being threaded incorrectly.
  2. Change Your Needle: If the machine starts making a weird "clunking" sound or skipping stitches, change the needle. It’s the "turn it off and back on again" of the sewing world.
  3. Start Slow: There is no race! Enjoy the hum of the machine and the feel of the fabric.

I am so excited for you to start this journey. Whether you want to make clothes, home decor, or dive into quilting like I did, your sewing machine is your ticket to a whole new world of creativity.

Are you ready to find your perfect match? I can't wait to see what you create!

Shop Our Partners

Click the images below to shop my favorite tools and fabrics from the partners I trust!

Happy sewing, friends!

Warmly,

Anisa
The Crafty Author

crafty-author-logo

I Can’t Believe What’s Inside This Box! Tula Pink Floral Reef Fabric Haul & Unboxing

May 12, 2026 By The Crafty Author

https://youtu.be/jz7396wLxpE

Hello, friends! I hope you all had a wonderful Mother’s Day filled with love, laughter, and maybe a little bit of quiet time to sneak away to your sewing rooms. I certainly did, and I am just so thrilled to be back with you today to share something that has me absolutely giddy.

If you know me, you know that getting a package in the mail is my love language, especially when that package comes from Pink Door Fabrics! There is just something about that signature pink box that makes my heart skip a beat. Today, I’m unboxing the latest Pink Door Box subscription, and let me tell you, it is a total "Reef" of beauty. Are you ready to see the magic inside? Let’s dive in!

The Star of the Sea: Tula Pink’s Floral Reef

First things first, let’s talk about the main event: the fabric! This month’s half-yard bundle features the stunning Floral Reef collection by the one and only Tula Pink. Friends, the colors are just out of this world. We’re talking vibrant teals, deep purples, and the most delicious magentas you’ve ever seen.

Tula Pink Floral Reef Half Yard Bundle and True Colors

The prints are exactly what we love about Tula, whimsical, intricate, and slightly unexpected. You can really see the bundle spread out so beautifully, with those teals, purples, and pinks popping right away. There are sharks, seahorses, and ocean-inspired details tucked into the prints, and the mix of Floral Reef with coordinating True Colors fabrics makes the whole box feel beautifully curated and ready for your next project.

Tula Pink Floral Reef Fabrics

And wait until you see the vinyl! It’s called "Reef What You Sew," and you can really appreciate the shine and transparency here. It’s a clear vinyl with pink dots and playful ocean details layered over that gorgeous print. It is one of those supplies that instantly makes you start planning a bag project!

Patterns to Make You "Set Sail"

Inside the box, I also found two fantastic patterns that have my creative gears turning. The first is "Set Sail" by Jaybird Quilts. If you’ve been following my journey here at The Crafty Author, you know I love a good geometric challenge that looks way more complicated than it actually is. This pattern is perfect for showing off those bold Floral Reef prints.

The second pattern is from So Sweetness, and it’s a total game-changer for all my bag-making enthusiasts out there. Between the two, I honestly don't know where to start first. Are you joining the madness and starting a new project this week? Tell me I’m not the only one!

All the Notions and a Little Bit of Sparkle

A box from Pink Door isn't just about the fabric; it’s about the "extras" that make sewing so much fun. I was blown away by the quality of the notions this month.

Pink anchor charm on pink cutting mat

We received:

  • Renaissance Ribbons: These are so luxurious and feature designs that match the collection perfectly.
  • Webbing: High-quality webbing that makes bag handles look professional and sturdy.
  • Zipper Sets: A whopping 3 yards of zipper tape and 9 pulls! I love having these on hand because I can cut them to the exact length I need for any project, like my quilt-as-you-go table runner.
  • Bag Charms: Oh my goodness, the charms! The anchor charms are such a fun little detail, and they are even cuter up close. The pink finish is playful and polished all at once, and they add that perfect pop of personality to a bag project.

Hands holding pink anchor charm keychain

And I can’t forget the whimsical touches, including the octopus playing cards, the cute scissors, and that special "SS Pink" charm that makes the whole box feel elevated.

Life Savor Tula Pink Bag Charm

It’s these little details that make the subscription feel like a monthly treat to myself.

A Real-Life Studio Moment (And a Little Dog Hair)

Now, I have to keep it real with you. As I was filming the unboxing, I realized that no matter how much I clean my studio, there is always a little bit of "extra love" floating around. Between Lola, Jack, and Petey, my three fur babies, dog hair is basically a permanent craft supply in this house!

If you see a stray hair on the fabric in the video, just know it’s a sign of a happy, lived-in home. My studio is my happy place, even when it’s a bit chaotic. Whether I'm working on a strip quilt series or just unboxing treats, I wouldn't have it any other way.

Watch the Full Unboxing!

I could talk about this fabric all day, but you really have to see it in motion to appreciate the shimmer, the scale of the prints, and the way the notions look on the pink mat. I’ve uploaded the full unboxing video so you can see every single item in detail.

https://youtu.be/jz7396wLxpE

"The best part of quilting isn't just the finished product; it's the excitement of the possibilities hidden inside a new stack of fabric."

What’s Coming Next?

I am already dreaming up some incredible kits using these Floral Reef fabrics. I’ll be teasing some of these designs in the The Crafty Author Clubhouse™ very soon, so make sure you’re part of our community to get the first look!

I am so incredibly inspired by this collection, and I hope it sparks a little bit of creativity in you, too. Life is too short for boring fabric, don't you think?

Stay crafty, and I'll see you in the next project!

Warmly,

Anisa
The Crafty Author


Shop Our Partners

Click the images below to shop our favorite supplies and brands!

Fat Quarter Shop Sewing Machines Plus AccuQuilt

From Tee to Treasure: Why T-Shirt Quilts are the New Graduation Tradition

May 11, 2026 By The Crafty Author

A professional Bernina sewing station in Anisa's studio with a colorful memory quilt draped in the background.

Hello friends! Can you believe it? Graduation season is officially upon us, and if you’re anything like me, you’re currently oscillating between “Aww, they’re growing up so fast!” and “Wait, where did all this stuff come from?!”

As a mama and a quilter with over 30 years under my belt, I’ve seen a lot of trends come and go, but there is one that has stolen my heart and refused to let go: The T-Shirt Quilt.

Are you joining the madness this year? If you have a senior in the house, you probably have a “drawer of doom.” You know the one. It’s overflowing with track meet shirts, theater production tees, that one neon-orange shirt from the 8th-grade field trip, and at least three shirts from clubs they were in for exactly two weeks.

Instead of letting those memories gather dust or, heaven forbid, donating them, why not turn them into The Quilted Tee? It’s the ultimate graduation tradition, and today, I’m sharing why these memory quilts are the absolute best gift you can give your graduate.

The Emotional "Hug" of a Memory Quilt

Let’s be real: heading off to college or starting a new career is terrifying. Your graduate is leaving the comfort of home for a tiny dorm room or a first apartment that probably smells a little bit like old sneakers.

A T-shirt quilt isn't just a blanket; it’s a portable hug. When they’re feeling homesick or stressed before a big exam, they can wrap themselves in a literal timeline of their accomplishments. I always say that quilting is just love made visible, and nowhere is that truer than with a memory quilt.

Every time I work on one of these projects in my studio, I find myself smiling at the stories the shirts tell. That 5K run they finished with their best friend? It’s there. The shirt from the school play where they had one line but gave it Oscar-level drama? It’s there too. It’s a visual history that says, “Look at everything you’ve done. You’ve got this!”

A warm lifestyle photo of a T-shirt memory quilt made from shirt logos displayed on a graduate's dorm bed with cozy decor and natural light.

Why T-Shirt Quilts are the New "Heirloom"

We used to think of heirlooms as fancy china or heavy wooden furniture. But let’s be honest: most 18-year-olds don't want a set of porcelain plates. They want something functional, cool, and meaningful.

T-shirt quilts have become the modern tradition because they bridge the gap between "sentimental keepsake" and "actually useful item." Plus, they are incredibly durable! When you use the right techniques, which I’m always thrilled to teach you over at The Crafty Author Clubhouse™ (COMING SOON!), these quilts can withstand the rigors of dorm life, laundry day, and beyond.

The Problem with the "Bin of Shirts"

I’ve talked to so many parents who say, “Oh, I have all their shirts in a plastic bin in the attic.” Friends, memories shouldn't live in a bin! T-shirts are notoriously difficult to store. They get yellowed, they take up a ton of space, and they’re basically just a snack for moths. By transforming them into a quilt, you’re preserving the fabric and the memory simultaneously.

Getting Started: It’s Easier Than You Think!

I know what you’re thinking. "Anisa, cutting into these shirts feels like performing surgery! What if I mess up?"

Take a deep breath. I’ve been there, and I promise you can do this. The key to a successful T-shirt quilt (or what I like to call "The Quilted Tee") is all in the preparation.

  1. Interface, Interface, Interface! T-shirts are stretchy. Quilting fabric is not. To keep your quilt from looking like a wavy mess, you must use a lightweight fusible interfacing on the back of every shirt. This stabilizes the knit fabric and makes it behave like a dream under your needle.
  2. Pick Your Layout. You don't have to just sew them in a boring grid! You can get creative with sashing, borders, or even a "mosaic" style where different sizes of shirt logos are fit together like a puzzle. If you’re looking for inspiration on how to piece things together, my About Me page shows some of the cozy, creative vibes we love here.
  3. Use the Right Tools. Trying to cut T-shirts with dull scissors is a recipe for frustration. A rotary cutter and a specialized cutting system make all the difference.

Studio photo of Anisa's Handi Quilter in a warm, organized creative sewing space.

Tips for a "Pro-Level" Graduation Quilt

If you want your graduate to actually use the quilt rather than just hang it on a wall, keep these tips in mind:

  • Choose a Soft Backing: Minky or a high-quality flannel makes the quilt extra cuddly. Perfect for those late-night study sessions!
  • Don't Forget the Label: This is the most important part! Include their name, graduation year, and a sweet message from you. Years from now, they’ll look at that label and remember exactly how much love went into every stitch.
  • Mix in Non-T-Shirts: Did they have a favorite flannel shirt or a pair of lucky socks? (Okay, maybe skip the socks). You can incorporate other fabrics to add texture and even more personality.

The Graduation Timeline: Don't Panic!

Are you staring at a pile of shirts and realizing graduation is only a few weeks away? Don't panic! While a full-sized quilt takes time, you can always start small. If you're really pressed for time, consider a quilted pillowcase made from their absolute favorite shirts.

However, if you want to tackle the full quilt, now is the time to start. I love the "Quilt As You Go" (QAYG) method for projects like this because it feels so much more manageable. If you haven't tried it yet, check out my Strip Quilt Series for some techniques that can definitely be adapted to your memory projects!

A close-up photo of a T-shirt quilt with school, sports, theater, and club shirt-logo blocks folded in a graduate's dorm room.

Why We Do What We Do

At the end of the day, we craft because we want to connect. Whether you’re a beginner who just bought your first machine or a seasoned pro, the goal is always the same: to create something beautiful that makes someone feel special.

Graduation is a huge milestone, not just for the kids, but for us too! It’s the end of one chapter and the beginning of another. Sending them off with a piece of their history, literally stitched together: is such a powerful way to celebrate that transition.

So, are you ready to dig through those closets and start your own "Tee to Treasure" journey? I am so excited to see what you create! If you need a little extra encouragement or a community to cheer you on, don't forget that The Crafty Author Clubhouse™ (COMING SOON!) is always open. We’d love to have you!

"A quilt will keep your body warm, but a T-shirt quilt will keep your heart warm too." : Anisa

Shop Our Partners

Ready to get started on your graduation project? Click the images below to shop my favorite tools and fabrics from the partners I trust!

Missouri Star Quilt Company Logo
Bernina Machine
Bernina B770 sewing machine

Happy stitching, friends! I can't wait to see your beautiful memory quilts.

Stay crafty,

Anisa 💖🧵✨

The Imperfection Manifesto: Why Your ‘Mistakes’ Are Your Maker’s Mark

May 9, 2026 By The Crafty Author

Anisa with a colorful handmade quilt in her cozy studio

Hello, friends! I am so thrilled that you’ve joined me today for the third installment of our Philosophy of the Stitch series.
If you’ve been following along, you know that we’ve been diving deep into the "why" behind our needles and thread. We’ve talked about the peace that comes from the process and the joy of choosing the perfect palette. But today, we’re going to talk about something a little more… messy.

We’re going to talk about mistakes.

Are you the kind of maker who reaches for the seam ripper the moment a corner doesn't align perfectly? Do you find yourself sighing over a wonky star or a stitch that went just a hair off-track? Trust me, I have been there! For years, I felt that if my quilts weren't "factory perfect," they weren't good enough. But over my 30 years of quilting, I’ve had a change of heart. I’ve realized that those little "imperfections" aren't actually flaws at all. They are your Maker’s Mark.

The Trap of the "Perfect" Quilt

We live in a world of mass production. You can walk into any big-box store and buy a quilt that has perfectly straight lines, perfectly uniform stitches, and perfectly symmetrical patterns. But do you know what those quilts are missing?

They’re missing a soul.

When everything is digitally programmed and laser-cut, the human element disappears. When we strive for that same level of robotic perfection in our own sewing rooms, we’re actually stripping away the very thing that makes handmade items so special. We get so caught up in the "should-bes" that we forget the "is."

I remember working on one of my early projects in my scrap quilt series. I was so focused on making every single scrap line up that I stopped having fun. I was stressed, my neck was tight, and I wasn't feeling creative, I was feeling like an inspector on an assembly line. That's not why we craft, is it? We craft to express ourselves!

The Thumbprint of the Maker

Think of your "mistakes" as a thumbprint. No two people have the same thumbprint, and no two makers have the same "flaws." When I look at a quilt I made twenty years ago, I don't see the missed corner as a failure. I see it as a snapshot of who I was at that moment. Maybe I was rushing because I was excited to see the finished product. Maybe I was distracted because one of my kids was telling me a story.

Maker's Mark Stitch

That little wonky stitch is proof that a living, breathing human being sat at a machine, perhaps my favorite Bernina or my trusty Handi Quilter, and poured their time and love into that fabric. It’s the "human-ness" of the piece.

"Your imperfections are not errors; they are the evidence of your presence in the work."

When you give a quilt as a gift, the recipient isn't looking for a 1/4 inch seam that is accurate to the millimeter. They are looking at the colors you chose, the softness of the batting, and the warmth it provides. They see the love. And years from now, when that quilt is being passed down, those little unique markers will be how your grandchildren know it was yours.

Lessons from the "Humility Block"

There is a wonderful legend in the quilting world about the "Amish Mistake." You might have heard it, the idea that Amish quilters would intentionally place one "wrong" block or a mismatched fabric in their quilts because "only God is perfect." While historians have mostly debunked this as a myth, the sentiment remains powerful.

We don't need to be perfect to be worthy. In fact, our imperfections are what make us relatable and real. Whether you’re making a Minnie Mouse baby quilt or a complex heirloom piece, the goal is completion and connection, not perfection.

Minnie Mouse Baby Quilt

Why Heirlooms Are Perfectly Imperfect

Have you ever visited an antique shop and looked at the quilts from the 1800s? Many of them have mismatched dyes, uneven hand-quilting, and blocks that don't quite square up. And yet, they are breathtaking. We call them "treasures." We don't look at a 150-year-old quilt and say, "Oh, look at that poor tension." We say, "Look at the incredible work this woman did with what she had."

Your projects are the heirlooms of tomorrow. When you embrace the "perfectly imperfect" nature of your work, you’re creating something that feels approachable. A quilt that is too perfect can sometimes feel cold, like you’re afraid to use it. But a quilt with a little character? That’s a quilt that begs to be snuggled under on a rainy Sunday afternoon.

Stack of Quilts

If you’re just starting out, please don't let the fear of making a mistake stop you from beginning. I always tell my beginners that an unfinished project is the only "mistake" you can truly make. If you finish it, it's a success! If you want a lower-pressure way to start, I highly recommend trying an easy rag quilt. The frayed edges are supposed to look a little wild, which is the perfect antidote to perfectionism!

Celebrating the Journey in the Clubhouse

This is exactly why I created The Crafty Author Clubhouse™ (COMING SOON!). I wanted a space where we could move away from the "quilt police" mentality and move toward a culture of encouragement. In the Clubhouse, we celebrate the "oops" moments just as much as the "aha" moments.

The Crafty Author Clubhouse

We share our wonky stars and our bobbin tangles because that is where the real learning happens. We’re not just making quilts; we’re building confidence. We’re learning to trust our hands and our hearts. If you’ve been feeling a little stuck or worried that your work isn't "good enough," just know this encouraging space is on the way. We will show you that your Maker’s Mark is something to be proud of!

The Imperfection Manifesto

So, are you ready to join the madness? Are you ready to put down the seam ripper and pick up the pace? Here is my challenge to you:

  1. Release the "Shoulds": Stop comparing your work to a computer-generated image.
  2. Keep the Character: If a mistake doesn't affect the structural integrity of the quilt, leave it. It’s part of the story.
  3. Date Your Work: Always sign your quilts. That "Maker’s Mark" is your legacy.
  4. Find Joy in the Doing: If you’re not smiling, you’re trying too hard for perfection.

Remember, my friends, a quilt is a hug made of fabric. And hugs aren't supposed to be stiff or perfectly symmetrical: they’re supposed to be warm, soft, and full of heart.

I am so proud of the beautiful, unique things you are creating. Keep stitching, keep dreaming, and most importantly, keep being you.

Shop Our Partners

Affiliate disclosure: I may earn a small commission at no extra cost to you.

Missouri Star Quilt Company Fat Quarter Shop

Shop Missouri Star Quilt Company
Shop Fat Quarter Shop

Thank you for being part of this journey with me. I can't wait to see your "perfectly imperfect" masterpieces!

Keep on craftin',

Anisa
The Crafty Author

7 Mistakes You’re Making with T-Shirt Quilts (And How to Fix Them)

May 8, 2026 By The Crafty Author

Anisa in her studio at The Crafty Author.

Hello, friends!

With graduation season just around the corner, I know so many of you are staring at a growing pile of high school sports jerseys, concert tees, and "Class of" shirts, wondering how on earth you're going to turn them into a masterpiece. Believe me, I’ve been there! There is something so incredibly special about a T-shirt quilt. It’s more than just a blanket; it’s a giant, cozy hug made of memories.

But let’s be real for a second: T-shirts are stretchy. They’re slippery. They have weird logos that don't want to play nice with your sewing machine. In my 30+ years of quilting, I’ve seen these common mistakes show up again and again in my studio, and I want to help you avoid them from the start!

If you’re feeling a little overwhelmed, take a deep breath. We’re going to walk through the seven most common mistakes beginners make when creating T-shirt quilts and, more importantly, exactly how to fix them. Are you ready to turn those tees into treasures? Let’s dive in!


1. Skipping the Stabilizer (The "Wobbly Quilt" Syndrome)

If I could only give you one piece of advice, it would be this: Do not skip the stabilizer.

T-shirts are made of knit fabric, which is designed to stretch so we can wear them comfortably. However, in the quilting world, "stretch" is often a four-letter word! If you try to sew a stretchy T-shirt block to a non-stretchy cotton sashing, your machine will pull the fabric, and you’ll end up with puckers, wavy seams, and a quilt that won't lay flat.

The Fix: Use a lightweight, fusible (iron-on) interfacing. I love a good woven or non-woven featherweight stabilizer. You want something that stops the stretch but doesn't make the quilt feel like a piece of cardboard. Simply iron it onto the back of your T-shirt before you do your final cutting. It turns that tricky knit into a stable fabric that behaves just like regular quilting cotton.

Anisa's actual polka-dot Bernina in her sewing corner stitching a stabilized T-shirt quilt block in her studio.
Using your actual sewing machine setup makes this step feel even more familiar and approachable!

2. Cutting Your Blocks Too Small

I see this all the time in my studio: someone gets so excited to start that they grab their scissors and cut right around the logo. But wait! You need to account for seam allowances. If the logo is 12 inches wide and you cut the block at 12 inches, you’re going to lose the edges of that beautiful design when you sew it into the quilt.

The Fix: Always leave at least 1 to 2 inches of "buffer" space around the graphic. If you want a 12-inch finished block, you should be cutting at least a 12.5-inch square. I actually prefer to cut my stabilized blocks slightly larger than I need and then trim them down to the perfect size later. It gives you so much more wiggle room!

3. Not Squaring Up Your Blocks

Precision is your best friend in quilting. If your blocks are even a quarter-inch off, by the time you get to the end of a row, your quilt will be lopsided. Many beginners try to "eyeball" it, but knit fabric is notoriously deceptive.

The Fix: Invest in a large square acrylic ruler (12.5" or 15" are great sizes for T-shirt quilts). After you've applied your stabilizer, use a rotary cutter and your ruler to "square up" every single block. This ensures that every corner is a perfect 90-degree angle. When your blocks are square, they fit together like a dream, and your rows will be straight as an arrow!

Studio close-up of a T-shirt quilt block being squared up with a ruler and rotary cutter in Anisa's sewing space.

4. Forcing a "One Size Fits All" Layout

We’ve all seen those T-shirt quilts that look like a perfect checkerboard. They’re classic! But what happens when you have a tiny pocket logo and a massive "State Championship" graphic that takes up the whole shirt? If you force them all into 12-inch squares, you’re either going to have a ton of empty space on the small ones or you’re going to cut off the big ones.

The Fix: Don't be afraid of a "puzzle" or "variable" layout! You can have different sized blocks in the same quilt. You can even add borders (sashing) around smaller blocks to make them match the size of the larger ones. It adds so much visual interest and ensures every memory is showcased perfectly.

"Your quilt should tell a story, and sometimes stories come in different shapes and sizes. Embrace the variety!"

5. Using the Wrong Needle

If you’ve ever had your machine skip stitches or leave little holes in your fabric, you might be using the wrong needle. A standard "Universal" needle is great for many things, but T-shirts (even stabilized ones) can be picky.

The Fix: Switch to a Ballpoint or Jersey needle. These needles have a slightly rounded tip that pushes the fabric fibers aside rather than piercing and breaking them. This prevents those pesky "runs" in the knit fabric and keeps your stitches looking professional and clean.

6. Quilting Directly Over Thick Logos

This is a heartbreak I want to help you avoid! Some T-shirts have thick, rubbery, or plastic-like screen printing. If you try to run your quilting needle directly through that thick plastic, your thread is likely to snap, or worse, your needle could break.

The Fix: Plan your quilting design to go around the logos. If you're doing a simple stipple or meander pattern, just "echo" the shape of the graphic. This leaves the logo flat and prominent while still securing the layers of the quilt together. If you're using a longarm or an embroidery machine, like the ones we use in my studio, you can easily program the path to skip those dense areas.

Anisa's actual polka-dot Bernina quilting a finished T-shirt quilt in her cozy sewing corner.

7. Using Low-Quality Backing and Batting

After all the hard work you put into the front, don't skimp on the back! This is one of those costly mistakes I’ve seen too many times in my studio—beautiful quilts ruined because the backing fabric bled in the wash or the batting wadded up after one trip to the dryer.

The Fix: Always use high-quality, 100% cotton quilting fabric for your backing and sashing. For the batting, I highly recommend an 80/20 cotton-poly blend or 100% cotton. Avoid those thick, high-loft polyester battings: they can be very difficult to quilt through when you’re already dealing with multiple layers of T-shirt and stabilizer.


Ready to take the next step?

Making a T-shirt quilt is such a rewarding journey, and I want you to feel confident every step of the way! If you want more hands-on guidance, come join the waitlist for The Crafty Author Clubhouse™ (COMING SOON!). It’s going to be a wonderful community where we’ll share exclusive tutorials, sew-alongs, and all the tips I’ve gathered over 30 years. We’d love to have you!

You might also find my Strip Quilt Series helpful if you're looking for different ways to piece your projects together.

Are you joining the madness and starting a graduation quilt this week? I want to hear about it! Leave a comment below or tag me on social media with your progress.

Happy stitching, friends!

Keep on craftin',

Anisa


Shop Our Partners

Click the images below to shop.

AccuQuilt Cutting System
Brother sewing machine

Anatomy of an Heirloom: Choosing Materials for the Next Century

May 7, 2026 By The Crafty Author

Hello, my dear friends! I am so thrilled to have you back here in the studio with me today.

If you followed along with the first part of our Philosophy of the Stitch series, you know we’ve been talking a lot about the why behind our quilting. We aren’t just making blankets to stay warm (though that’s a lovely bonus!); we are crafting stories. We are stitching together memories, quiet moments of creativity, and pieces of ourselves.

But here is the big question: how do we make sure those stories last? How do we ensure that a hundred years from now, a great-grandchild will wrap themselves in your work and feel that same warmth?

Today, we are diving deep into the Anatomy of an Heirloom. We’re going to talk about the physical components, the fabrics, the threads, and the "secret" ingredients, that transform a simple project into a legacy that stands the test of time.

This page contains affiliate links. If you shop through these links, I may earn a small commission at no extra cost to you.


The Heart of the Matter: It Starts with Intention

Before we even touch a rotary cutter, an heirloom begins in the heart. I’ve always believed that an heirloom isn’t just defined by its age, but by the intention behind it.

When you decide to make a quilt that will last a century, you’re making a promise to the future. You’re saying, "I care enough about this person and this craft to use the very best I can find." It’s a shift in mindset from "I just want to finish this quickly" to "I want to build this beautifully."

Are you ready to build something that lasts? I know I am!

"An heirloom is a conversation between generations, stitched in cotton and bound with love."

Modern Quality: Why "Quilt Shop Quality" Matters

I get asked all the time: "Anisa, does the brand of fabric really matter?" My answer is a resounding yes!

If we want our quilts to survive a century of snuggles, washes, and moves, we have to start with the best foundation. Modern, high-quality quilting cotton (often called "Quilt Shop Quality") is specifically engineered for longevity. It has a higher thread count, which means the weave is tighter and less likely to fray or thin over time.

When you’re browsing fabrics, look for 100% premium cotton. These fabrics have been processed to minimize shrinking and maximize colorfastness. Cheap, thin cottons from big-box stores might look cute on the bolt, but after twenty washes, they can become "see-through" or start to pill. We want our heirlooms to stay vibrant and strong!

Woodland Baby Quilt Detail

Mixing the Old with the New: The Sentimental Scrap

One of my favorite ways to create a true heirloom is by incorporating "found" fabrics: what I like to call the sentimental scrap. Maybe it’s a piece of your father’s favorite flannel shirt, a scrap from a baby’s first onesie, or even a vintage handkerchief from your grandmother.

Mixing vintage textiles with modern quilting cotton is a beautiful way to anchor your quilt in history. However, it does require a little bit of extra care!

How to Mix Safely:

  1. Test for Strength: Gently tug on the vintage fabric. If it feels brittle or "shreds" under your fingers, it might be too fragile for a quilt that will be used. Consider using it in a wall hanging instead!
  2. Stability is Key: If the vintage fabric is thin or stretchy (like a t-shirt or old silk), I highly recommend using a high-quality fusible interface to give it the same "weight" and stability as your modern cotton.
  3. Color Fastness: Vintage fabrics are notorious for "bleeding" when washed. Always do a soak test with a "Color Catcher" before sewing it into your masterpiece.

Blending these pieces of the past with the durability of the present is where the magic really happens. It’s like a hug from the past tucked inside a modern work of art!

The Silent Support: Choosing Your Thread

If fabric is the body of the quilt, the thread is the skeleton. You wouldn't build a house with rusted nails, would you? Of course not!

For an heirloom, I almost always reach for a high-quality, long-staple cotton thread. Brands like Aurifil are my go-to because they are incredibly strong but produce very little lint. This keeps your sewing machine happy and ensures your seams won't snap fifty years down the road.

Brother Dream Machine in Anisa's Studio

Some folks love polyester thread because it’s nearly unbreakable. While that’s true, there is an old quilting school of thought that says polyester thread can actually "cut" through cotton fabric over decades of friction. To be safe, I love to match fiber to fiber: cotton thread for cotton fabric. It’s a match made in heaven!


Shop Our Partners

Missouri Star Quilt Company Fat Quarter Shop AccuQuilt

Shop Missouri Star Quilt Company
Shop Fat Quarter Shop
Shop AccuQuilt


The Batting Secret: Natural Over Synthetic

This is a "hot topic" in the quilting world, but if we’re talking about 100-year longevity, natural fibers win every time.

100% cotton or a cotton/wool blend batting is the gold standard for heirlooms. Why? Because natural fibers breathe. They don't trap moisture, which can lead to mildew, and they don't become "brittle" or sticky like some old-school 100% polyester battings can.

Plus, there is nothing quite like the "crinkle" of a cotton-filled quilt after its first wash. It gives it that instant "vintage" feel that only gets better with age.

Join the Community: The Crafty Author Clubhouse™

Speaking of building things together, I have some super exciting news! If you’re looking for more in-depth guidance on choosing materials, mastering complex blocks, or just finding your creative tribe, you won't want to miss The Crafty Author Clubhouse™ (COMING SOON!).

We’ll have exclusive tutorials, curated project kits, and a space where we can all grow together as makers. I can't wait to welcome you inside!

Studio Inspiration

Construction and Care: The Final Step

Even the best materials won't last if the construction is rushed. When you’re sewing for the next century, precision is your best friend.

  • Consistent Seam Allowances: Make sure your 1/4" seam is accurate. If seams are too narrow, they are the first place a quilt will fail.
  • Backstitch at the Edges: If you're doing a lot of piecing or Quilt-As-You-Go, a tiny backstitch at the beginning and end of your seams adds that extra layer of security.
  • The Label: No heirloom is complete without a label! Use a permanent fabric pen to write your name, the date, and the "story" of the quilt on the back. Future generations will thank you for it!

Heirloom Quilt

A Legacy in Every Stitch

Creating an heirloom is a journey, not a race. It’s about the slow, deliberate choice of a soft pink floral, the careful winding of a bobbin, and the quiet joy of seeing a vision come to life.

When you choose your materials with intention, you aren't just making a quilt. You are making a promise. You are telling the future that beauty, craft, and love are worth preserving.

Are you working on a project that you hope will become an heirloom? I would love to hear about it! Drop a comment below or share your progress with me on social media. We’re in this creative madness together, and I wouldn't have it any other way!

Happy stitching, and keep on craftin’!

Warmly,

Anisa
Owner, The Crafty Author

The Ultimate Graduation Gift: Turning T-Shirts into a Lifetime of Memories

May 6, 2026 By The Crafty Author

A beautiful finished Navy-themed T-shirt quilt featuring commemorative patches and patriotic designs.

Hey friends!

Can you believe it’s already graduation season? It feels like just yesterday we were packing up school lunches and shopping for first-day-of-school outfits, and now here we are, getting ready to watch our favorite students walk across that stage. Whether you have a high schooler heading off to college or a college grad moving into their first "real" apartment, this time of year is just bursting with pride, a little bit of nostalgia, and maybe a few happy tears.

I don't know about you, but I always find myself wanting to give a gift that actually means something. You know the ones, the gifts that don't just sit on a shelf or get spent in a week, but the ones they’ll keep for years and years. And if there is one thing I’ve learned in my 30+ years of quilting, it’s that there is absolutely nothing more special than a T-shirt quilt.

Today, I want to talk about why these memory quilts are the ultimate graduation gift and how you can bring one to life, whether you’re a seasoned pro behind the sewing machine or you’d rather leave the stitching to me!

Why T-Shirt Quilts are the Perfect Graduation Gift

Let’s be honest: our kids collect T-shirts like they’re going out of style. Every club, every sports team, every spirit week, and every volunteer event comes with a shirt. By the time graduation rolls around, those shirts are usually stuffed into a drawer or a plastic bin under the bed. They’re full of memories, the winning goal, the lead role in the play, the long hours spent with best friends, but they aren't exactly doing anyone any good hidden away in the dark.

That’s where the magic of a T-shirt quilt comes in.

When you turn those shirts into a quilt, you aren't just giving them a blanket; you’re giving them a way to wrap themselves in their own story. It’s a way to preserve those memories so they don’t fade or get lost. Plus, let’s talk about the practical side for a second! Most dorm rooms are… well, let’s just say they’re a little cold and corporate. A custom quilt adds instant warmth and a piece of home to a brand-new space. It’s like a giant hug from Mom (or Grandma!) that they can take with them wherever they go.

Option 1: The DIY Route with The Crafty Author

Are you feeling inspired to pull out your sewing machine and tackle this project yourself? I am so thrilled when I hear from friends who want to learn this skill! If you’ve been following me for a while, you know that my goal here at The Crafty Author is to take the "overwhelming" out of quilting and make it fun.

Making a T-shirt quilt can be a bit intimidating because T-shirts are stretchy (and we all know how much quilters love stable fabric!), but I promise you can do it! My favorite method for these projects is the Quilt As You Go (QAYG) method. It is such a game-changer because you aren't wrestling a massive, heavy quilt through your machine all at once. You work with one block at a time, which makes the whole process so much more manageable.

A Few Tips for the DIY-er:

  • Stabilizer is your best friend: Seriously, don't skip this! Since T-shirt material is knit and stretchy, you need to iron on a lightweight fusible stabilizer to the back of every shirt before you even think about cutting. This makes the shirt behave like a normal woven fabric.
  • Uniform Blocks: I usually recommend cutting your shirts into 15" squares. It’s a great size to capture most graphics without cutting off the important parts.
  • Mix in the Memories: Don't just stick to standard cotton tees. Did they have a favorite hoodie? A jersey from their championship season? You can include those too!

If you want to see exactly how I do it, I have a whole series of tutorials on my YouTube channel where I walk you through the preparation, the cutting, and that magical QAYG assembly. It’s like having me right there in the room with you!

Anisa's professional memory quilt studio setup featuring the Handi Quilter Simply Sixteen longarm at The Crafty Author

Option 2: Let Us Do the Work for You at The Quilted Tee

I know, I know, graduation season is busy. Between the parties, the ceremonies, and the planning, sometimes there just aren't enough hours in the day to sit down and sew a full queen-sized quilt. If you have the shirts but not the time (or the desire to learn a new skill right now!), that is exactly why I started The Quilted Tee.

At The Quilted Tee, I specialize in taking your pile of "tee-sures" and turning them into professional, high-quality heirlooms. As the owner of The Quilted Tee and The Crafty Author, I treat every single shirt with the care it deserves, ensuring that the graphics are centered, the stitching is secure, and the final product is something you’ll be proud to gift.

The Quilted Tee x The Crafty Author brand image representing Anisa's memory quilt business

Whether you want a full-sized quilt for their bed or a smaller "lap quilt" for the couch, we’ve got you covered. We even make memory pillows if you only have a few special shirts but still want to create something sentimental!

More Than Just Fabric

Whenever I’m working on a memory quilt in my studio, I find myself thinking about the person who wore those shirts. I think about the laughter, the hard work, and the milestones represented in each block. That is why I love what I do so much. It isn't just about the fabric or the thread, it’s about the connection.

Are you ready to start gathering those shirts? Whether you’re joining the madness and sewing it yourself or sending them my way, I promise you won’t regret it. Watching a graduate’s face light up when they see all their accomplishments stitched together into one beautiful piece… well, there’s just nothing else like it.

If you have questions about which stabilizer to use or how many shirts you need for a certain size, don't be shy! Leave a comment or reach out. I’m here to help you every step of the way.

Shop Our Partners

Click the images below to shop for my favorite quilting tools and supplies!

Sewing Machines Plus
AccuQuilt
HTVRONT

Keep on craftin’!

Warmly,

Anisa
Owner, The Crafty Author

"A quilt is more than a blanket; it’s a story told in stitches."

  • « Go to Previous Page
  • Page 1
  • Page 2
  • Page 3
  • Page 4
  • Page 5
  • Interim pages omitted …
  • Page 20
  • Go to Next Page »

Primary Sidebar

FOLLOW ME ON SOCIAL MEDIA

  • Facebook
  • Twitter
  • Instagram
  • Pinterest
  • YouTube

Find quilting fabric and quilting supplies for your project at Fat Quarter Shop

SUBSCRIBE TO MY BLOG POSTS

SEARCH PAST PROJECTS BY DATE

SEARCH FOR PROJECTS BY NAME

Privacy & Cookies: This site uses cookies. By continuing to use this website, you agree to their use.

To find out more, including how to control cookies, see here: Cookie Policy
  • HOME
  • BLOG
  • QUILT SERIES
  • THE CRAFTY AUTHOR™ CLUBHOUSE
  • SHOP THE QUILTED TEE
Copyright © 2026 Crafty Author